 Save
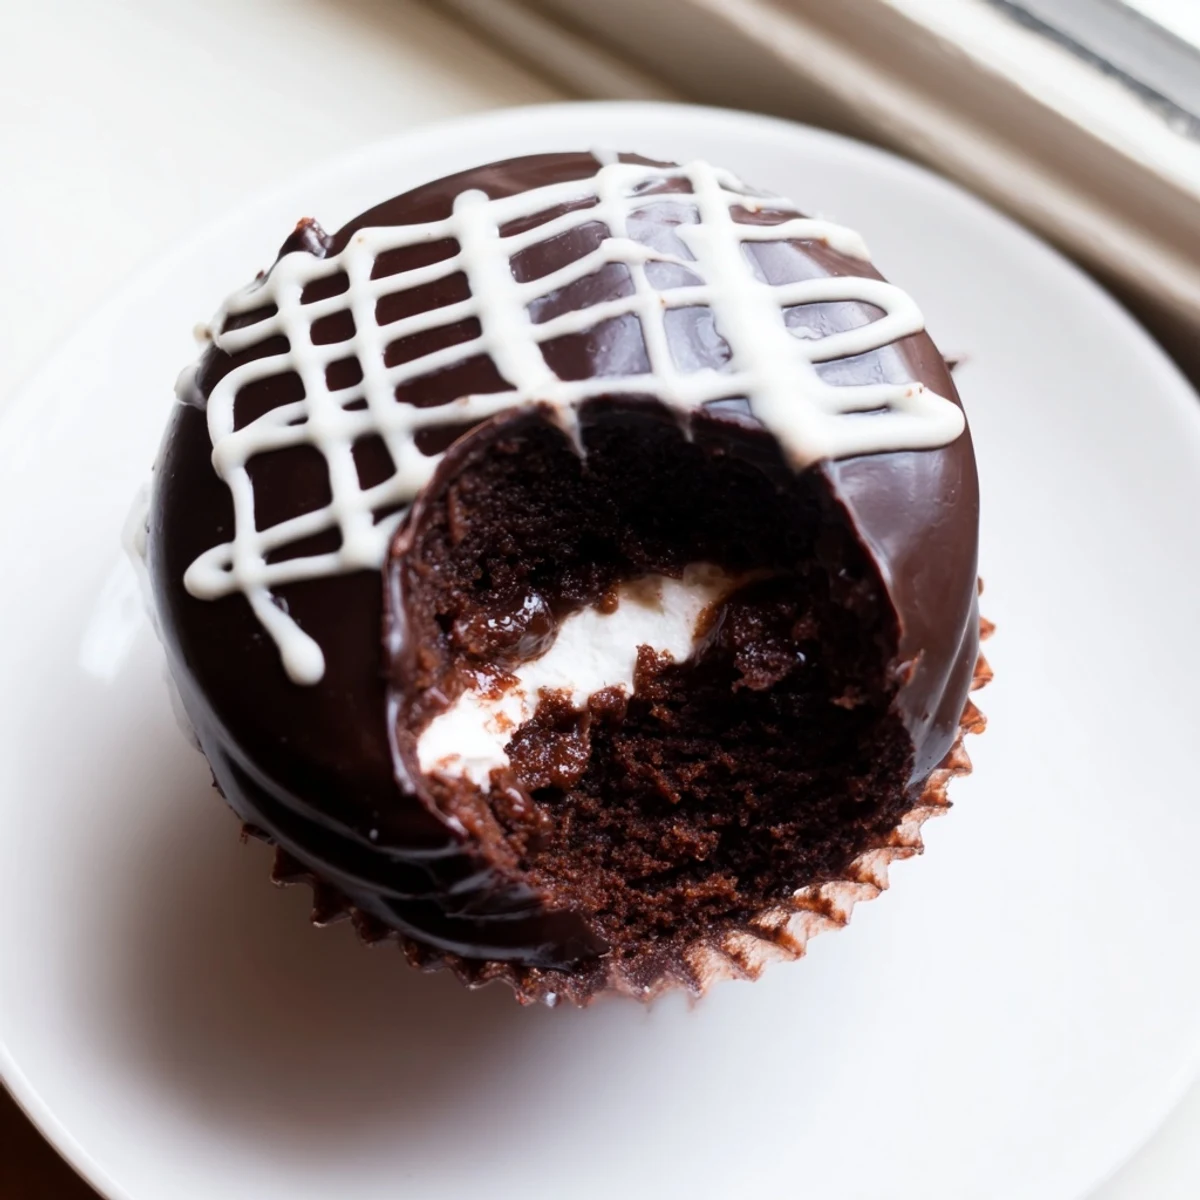
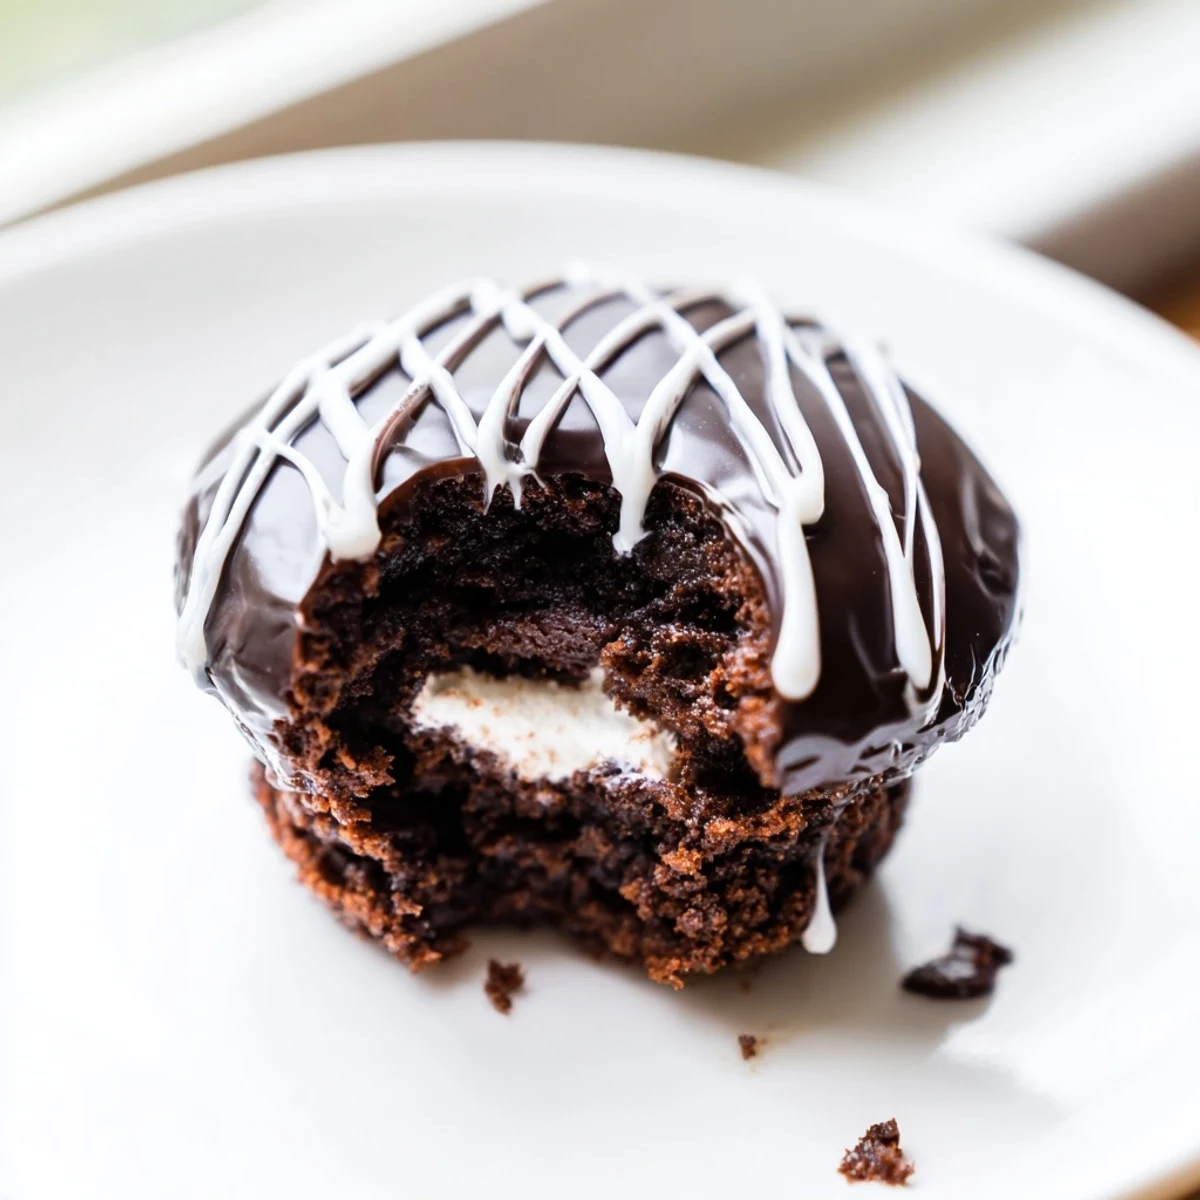
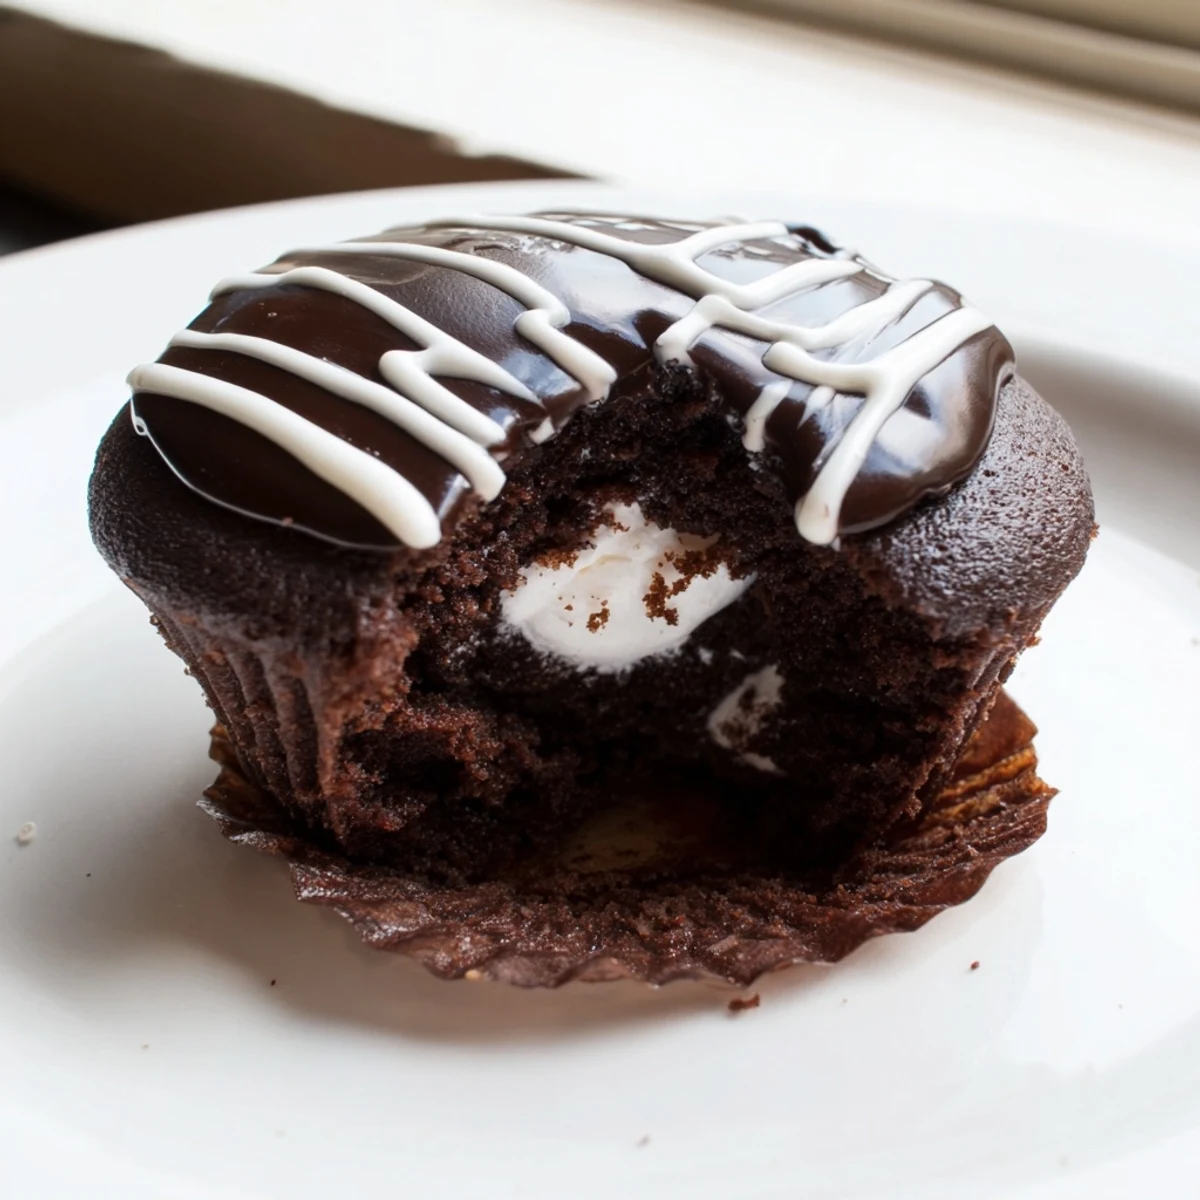
Save These homemade Hostess cupcakes bring the classic American treat right to your kitchen. Rich chocolate cupcakes are baked until tender, then injected with a fluffy marshmallow filling that's buttery and sweet.
Each cupcake gets dipped in a glossy semi-sweet chocolate ganache, creating a smooth, decadent shell. The finishing touch is the signature white icing squiggle piped across the top.
While they take about 90 minutes total with cooling time, the process is straightforward. Perfect for birthdays, bake sales, or satisfying that nostalgic craving for the iconic snack cake.
There is something deeply satisfying about recreating a childhood grocery store icon in your own kitchen, especially when the result tastes exponentially better than anything wrapped in cellophane. My first attempt at these homemade Hostess cupcakes ended with marshmallow filling squirted across my counter, my cat, and somehow the ceiling fan. That disaster taught me everything I now know about patience, piping bags, and the importance of a steady hand.
I brought a batch of these to a friends potluck last autumn and watched a grown man close his eyes after one bite and whisper that it was better than his grandmothers birthday cake. Nobody believed me when I said they were homemade until I showed them the empty mixing bowls still sitting in my sink.
Ingredients
- 1 cup (120 g) all-purpose flour: The structural backbone of the cupcake, sifted to prevent any dense or heavy spots.
- 1/2 cup (45 g) unsweetened cocoa powder: Use Dutch-processed if you want a deeper, darker chocolate flavor that punches through the sweet filling.
- 1 tsp baking powder and 1/2 tsp baking soda: This dual leavening combo gives the cupcakes a tender crumb with just enough lift.
- 1/4 tsp salt: Never skip this, because salt is what makes chocolate taste like chocolate instead of just sweet brown dust.
- 1/2 cup (115 g) unsalted butter, softened: Leave it out for about an hour before baking so it creams smoothly with the sugar.
- 1 cup (200 g) granulated sugar: Standard white sugar works best here since the cocoa powder already adds plenty of deep flavor.
- 2 large eggs: Add them one at a time to keep the batter emulsified and silky.
- 1 tsp vanilla extract: A good quality vanilla elevates every single component of this recipe, so do not cheap out here.
- 1/2 cup (120 ml) whole milk: The fat in whole milk keeps the crumb moist and tender where skim milk would leave it dry.
- 1/2 cup (120 ml) hot water: This is the secret trick that blooms the cocoa powder and thins the batter to the perfect consistency.
- 1/2 cup (115 g) unsalted butter (for filling): Again, softened to room temperature so it whips up fluffy without lumps.
- 1 cup (120 g) powdered sugar: Sift this into the butter to avoid grainy filling that nobody wants to bite into.
- 1 cup (100 g) marshmallow creme: This is the magical ingredient that gives the filling its signature stretchy, gooey texture.
- 1 tsp vanilla extract (for filling): Double the vanilla love for the filling because it is the star of the show.
- 1/2 cup (120 ml) heavy cream: The fat content here is what makes ganache silky instead of stiff and chalky.
- 4 oz (115 g) semi-sweet chocolate, chopped: Chop it finely so it melts evenly when the hot cream hits it.
- 1/4 cup (30 g) powdered sugar (for swirl): Mixed with just enough milk to make a thick but pipeable white icing.
- 1 tsp whole milk (for swirl): Add this drop by drop until you get a consistency that holds its squiggly shape.
Instructions
- Prep your oven and pan:
- Preheat your oven to 350 degrees F and line a 12-cup muffin tin with paper liners, making sure each one sits flat.
- Sift the dry ingredients:
- In a medium bowl, sift together the flour, cocoa powder, baking powder, baking soda, and salt until uniformly blended and free of lumps.
- Cream butter and sugar:
- In a large bowl, beat the softened butter and granulated sugar with an electric mixer until the mixture looks pale, fluffy, and lighter in texture, about three minutes.
- Add eggs and vanilla:
- Crack in the eggs one at a time, mixing well after each addition, then stir in the vanilla extract until fully incorporated.
- Build the batter:
- Add the flour mixture in three parts, alternating with the milk, mixing just until each addition disappears, then stir in the hot water until the batter is smooth and glossy.
- Bake the cupcakes:
- Divide the batter evenly among the 12 liners and bake for 18 to 20 minutes until a toothpick inserted in the center comes out clean, then cool completely.
- Whip the marshmallow filling:
- Beat the butter and powdered sugar together until fluffy, then fold in the marshmallow creme and vanilla until you have a smooth, pillowy filling.
- Fill the cupcakes:
- Transfer the filling to a piping bag fitted with a small round tip, insert the tip into the center of each cupcake, and squeeze gently until you feel a slight resistance.
- Make the ganache:
- Heat the cream in a small saucepan until steaming, pour it over the chopped chocolate, wait two minutes, then stir until you have a glossy, velvety mixture that cools for five minutes.
- Dip and garnish:
- Dip the top of each filled cupcake into the ganache, let it set for ten minutes, then pipe the white icing swirl across the top in the classic squiggly pattern.
 Save
Save My neighbor knocked on my door last winter holding one of these cupcakes and asked if I had secretly gone to culinary school. I had not, but that question felt like the highest compliment a home baker could receive.
Timing and Planning
The total time clocks in at about an hour and a half including cooling and assembly, but you can spread the work across two days without losing any quality. Bake the cupcakes the night before and store them in an airtight container, then fill and dip them the next morning when you are fresh and patient.
Storage and Freshness
These cupcakes stay lovely for up to three days at room temperature when stored under a cake dome or in a sealed container. The ganache firms up beautifully as it sits, and the filling actually becomes more cohesive overnight, making day two arguably better than day one.
Getting the Swirl Right
The iconic white swirl is the finishing touch that makes people gasp, and it is easier than it looks if you keep a few things in mind. Practice on a plate first to get the rhythm of the squiggle before committing to your ganache-topped masterpieces.
- Use a small piping bag or even a zip-top bag with a tiny corner snipped off for maximum control over the swirl.
- The icing should be thick enough to hold its shape but thin enough to flow smoothly without breaking the line.
- Work quickly once the ganache has set because the window for the swirl to adhere properly is surprisingly short.
 Save
Save Every time I pipe that little white squiggle across a freshly ganached cupcake, I feel like I am signing my name on something special. These are worth every messy moment.
Recipe FAQs
- → How do I get the marshmallow filling inside the cupcakes?
-
Use a piping bag fitted with a small round tip. Insert the tip directly into the center of each cooled cupcake top and gently squeeze while slowly pulling outward. You'll feel the cupcake expand slightly as the filling goes in.
- → Can I make these cupcakes ahead of time?
-
Yes, you can bake the cupcakes a day in advance and store them in an airtight container. Fill and dip them in ganache on the day you plan to serve for the freshest results and best texture.
- → Why is my ganache not smooth and glossy?
-
Make sure your cream is hot enough—steaming but not boiling. Pour it over finely chopped chocolate and let it sit undisturbed for two minutes before stirring. Stir gently from the center outward until fully combined and shiny.
- → What can I substitute for marshmallow creme?
-
If you can't find marshmallow fluff, you can melt regular marshmallows with a tablespoon of corn syrup and fold that into the butter-sugar mixture. The texture may vary slightly but will still taste delicious.
- → How should I store leftover cupcakes?
-
Store them covered at room temperature for up to three days. Avoid refrigerating as the ganache can dull and the filling firms up too much. Bring them to cool room temperature before serving if needed.
- → Can I use Dutch-processed cocoa powder instead of regular?
-
Absolutely. Dutch-processed cocoa will give you a deeper, richer chocolate flavor and a darker color. Since the batter uses baking soda as well as baking powder, either type of cocoa works well in this batter.
