 Save
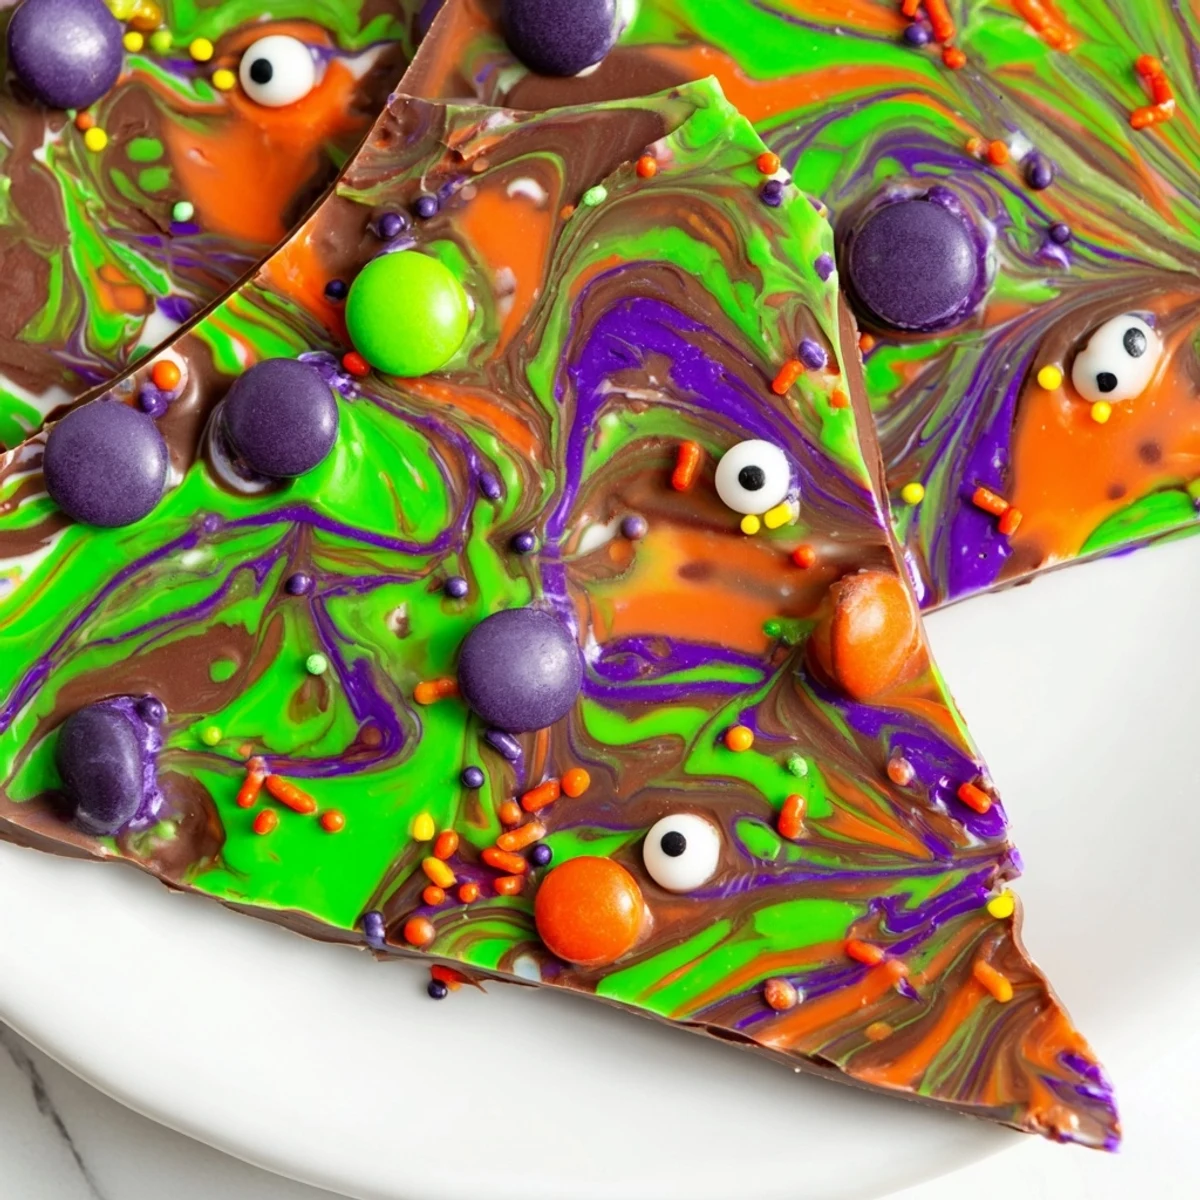
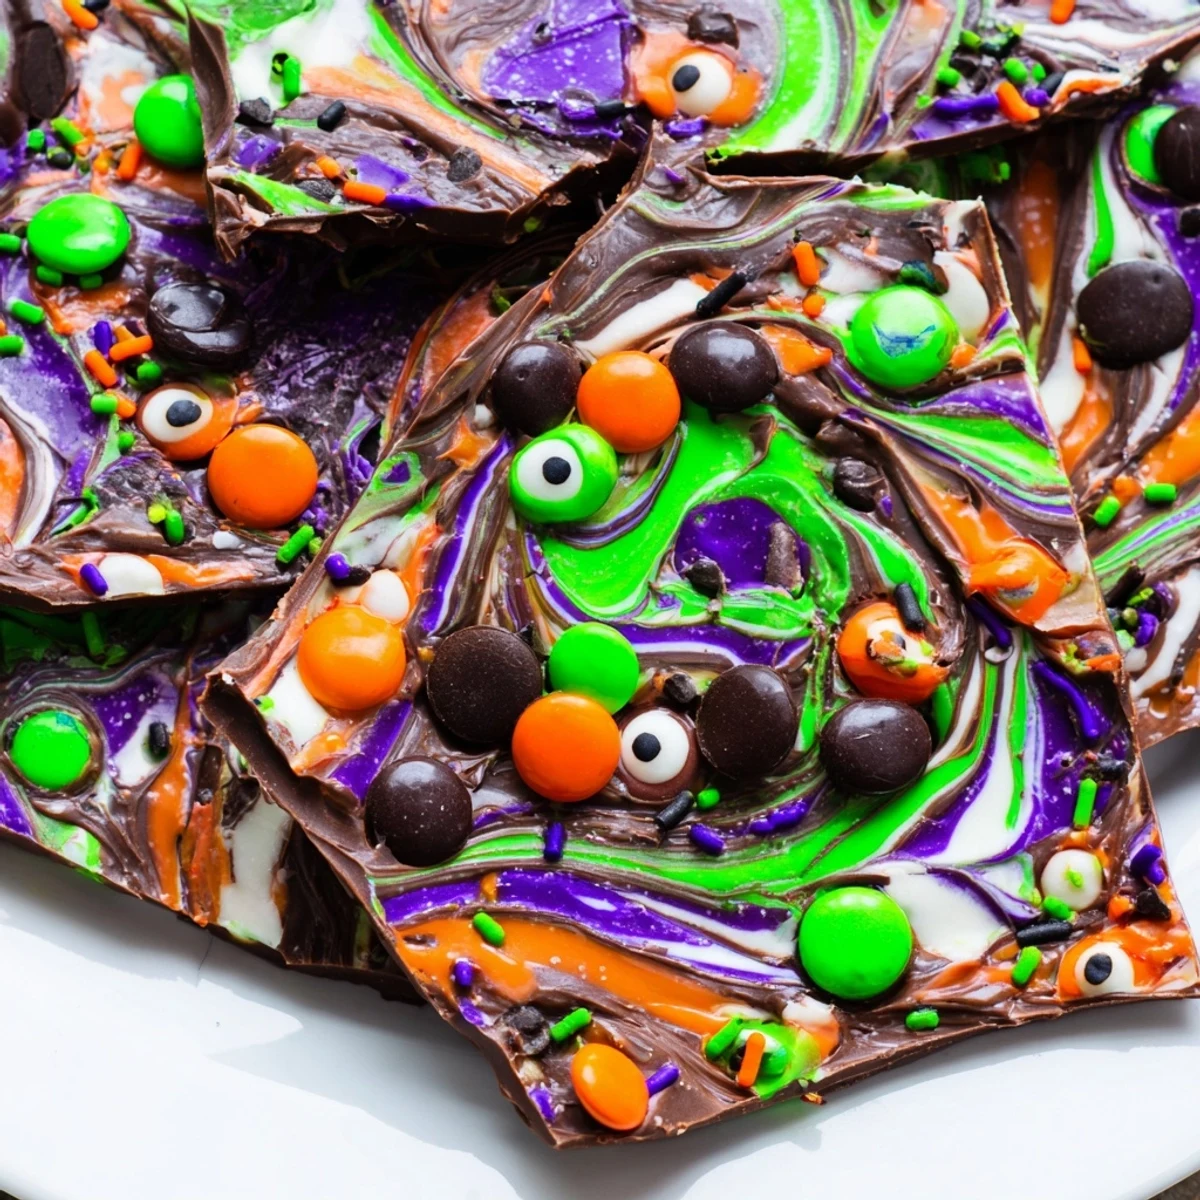
Save This festive chocolate bark combines melted semisweet and white chocolate swirled with colorful candy melts for a marbled effect. Top with candy-coated chocolates, googly eyes, and Halloween sprinkles for a spooky presentation that's as fun to make as it is to eat. Ready in just 20 minutes, this no-bake treat sets at room temperature and breaks into shareable pieces perfect for Halloween gatherings.
Last Halloween, my daughter decided we needed something "spooky but not actually scary" for her class party. I stood in my kitchen melting chocolate at midnight, suddenly realizing this was more fun than any costume I'd ever thrown together. The candy eyes staring up from the tray made me laugh out loud in the quiet house.
The first time I made this, I went overboard with the candy melts and ended up with something that looked less like marble and more like a Jackson Pollock painting. My kids didn't care they fought over the craziest looking pieces. Now I know that less swirling actually creates those sophisticated looking webs and ripples everyone thinks are so impressive.
Ingredients
- Semisweet chocolate chips: This forms your dark canvas and the rich contrast that makes those colorful swirls pop
- White chocolate chips: Creates the classic spider web effect when swirled into the dark chocolate
- Colorful candy melts: Pick 2-3 Halloween shades like electric green, vibrant orange, or deep purple
- Mini candy coated chocolates: These add little bursts of color and crunch throughout
- Candy eyes: The absolute star of the show that makes this bark come alive
- Halloween sprinkles: Orange and black sprinkles, edible glitter, or tiny bat shapes work perfectly
Instructions
- Prep your workspace:
- Line a large baking sheet with parchment paper and have all your decorations ready within arm's reach
- Melt the dark chocolate:
- Microwave the semisweet chips in 30 second bursts, stirring well between each, until completely smooth and glossy
- Create the base:
- Pour the melted dark chocolate onto your parchment and spread it into an even rectangle about 1/4 inch thick
- Melt the color chocolates:
- In separate microwave safe bowls, melt the white chocolate and colored candy melts in 20 second intervals
- Swirl the magic:
- Drop spoonfuls of the white and colored chocolates over the dark base, then drag a toothpick through them in swirling patterns
- Add the personality:
- Scatter the candy eyes, chocolate candies and sprinkles over the warm bark before it sets
- Let it set:
- Leave at room temperature for 30 minutes or refrigerate for 10 to 15 minutes until completely firm
- Break into pieces:
- Use your hands to snap the bark into irregular jagged pieces, revealing the beautiful patterns inside
 Save
Save I brought a platter of this to my office breakroom last October and watched grown adults light up when they spotted the googly eyes staring back at them. Something about those silly candy eyes transforms fancy chocolate into pure joy. Now it's the one Halloween treat I'm actually asked to repeat year after year.
Making It Your Own
Swap the semisweet chocolate for milk chocolate if you prefer something sweeter or go with dark chocolate for a more sophisticated bark that adults love. You can also add crushed pretzels, salted peanuts, or even potato chips for a salty sweet crunch that keeps people coming back for more.
Storage and Make Ahead
This bark stores beautifully in an airtight container at cool room temperature for up to one week. If your kitchen runs warm or you want to make it several days ahead, keep it in the refrigerator. Just bring it to room temperature before serving so the chocolate doesn't sweat.
Serving Suggestions
Pile pieces onto a vintage cake stand or scatter them across a wooden serving board for an effortless Halloween dessert table. You can also package individual pieces in clear cellophane bags tied with orange ribbon for party favors or classroom treats.
- Make extra because it disappears faster than you expect
- Set out a small bowl of extra candy eyes for people to play with
- Pair with hot apple cider for the ultimate fall treat combo
 Save
Save Every October now, my daughter asks if we're making the witches bark again. Some traditions stick around not because they're perfect but because they're just too fun to give up.
Recipe FAQs
- → How long does the chocolate bark take to set?
-
The bark sets at room temperature in about 15–20 minutes, or you can refrigerate for 10–15 minutes to firm it up faster. Once set, it's ready to break into pieces.
- → Can I use different types of chocolate?
-
Absolutely. Swap semisweet chips for milk or dark chocolate depending on your preference. The technique works the same regardless of chocolate type.
- → How should I store leftover bark?
-
Keep in an airtight container at cool room temperature for up to one week. Avoid storing in warm places as the chocolate may soften or melt.
- → Is this treat nut-free?
-
It can be. Use nut-free certified chocolate and candies, and check all labels carefully. Skip nuts or pretzels if serving anyone with allergies.
- → Can I make this ahead of time?
-
Yes. Prepare up to a week in advance and store properly. The bark holds up well and maintains its texture when kept in a cool, dry place.
- → What if I don't have candy melts?
-
You can skip the colorful swirls and just use white and dark chocolate, or tint melted white chocolate with gel food coloring for custom Halloween colors.
