 Save
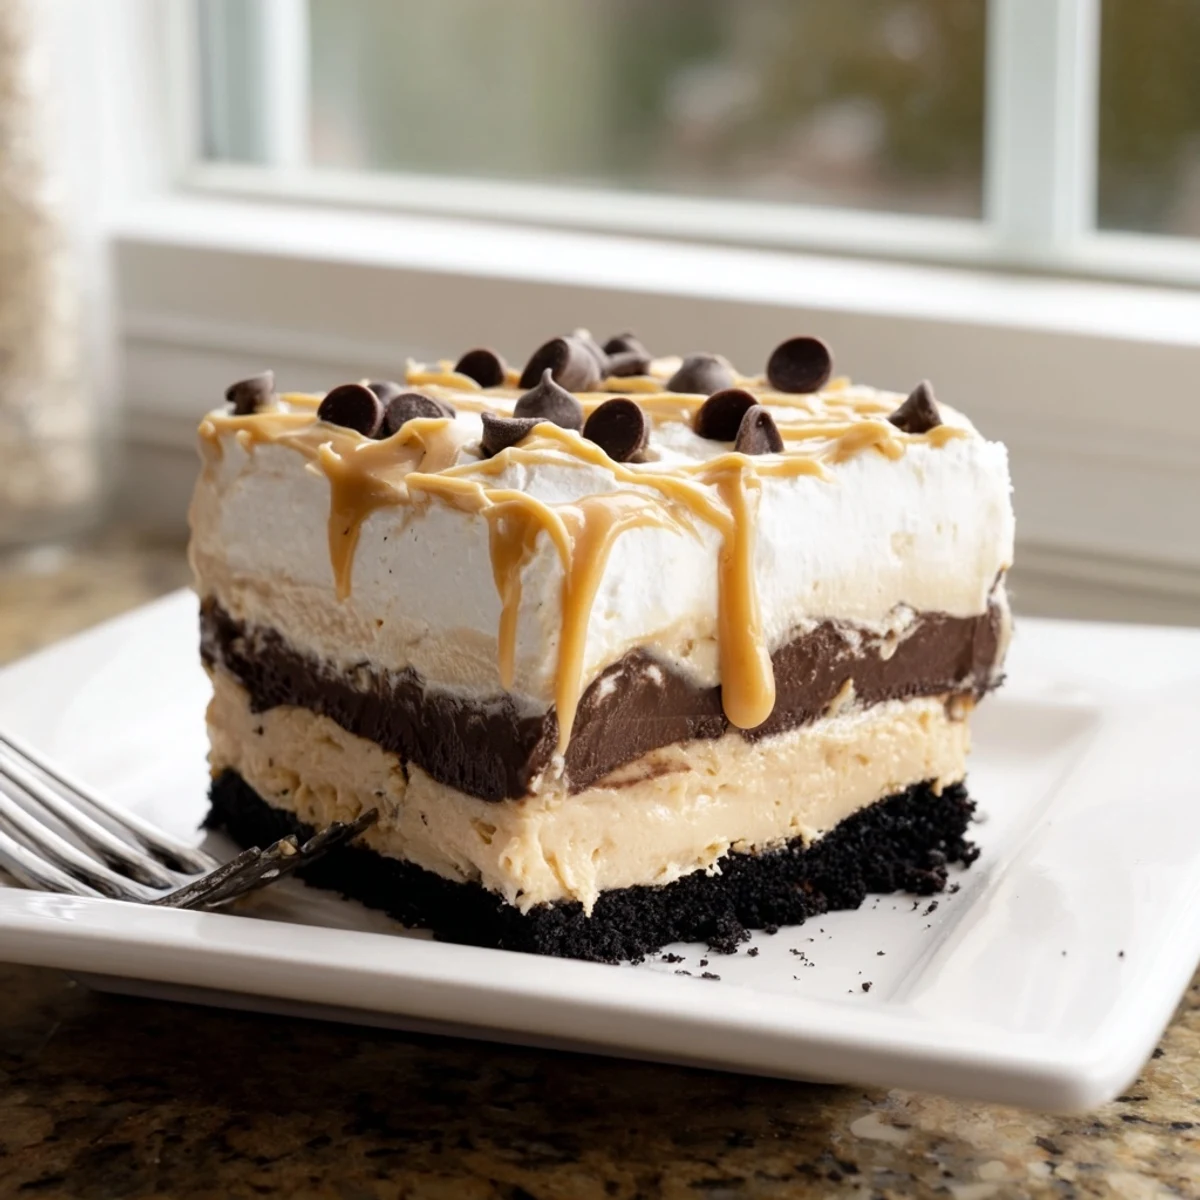
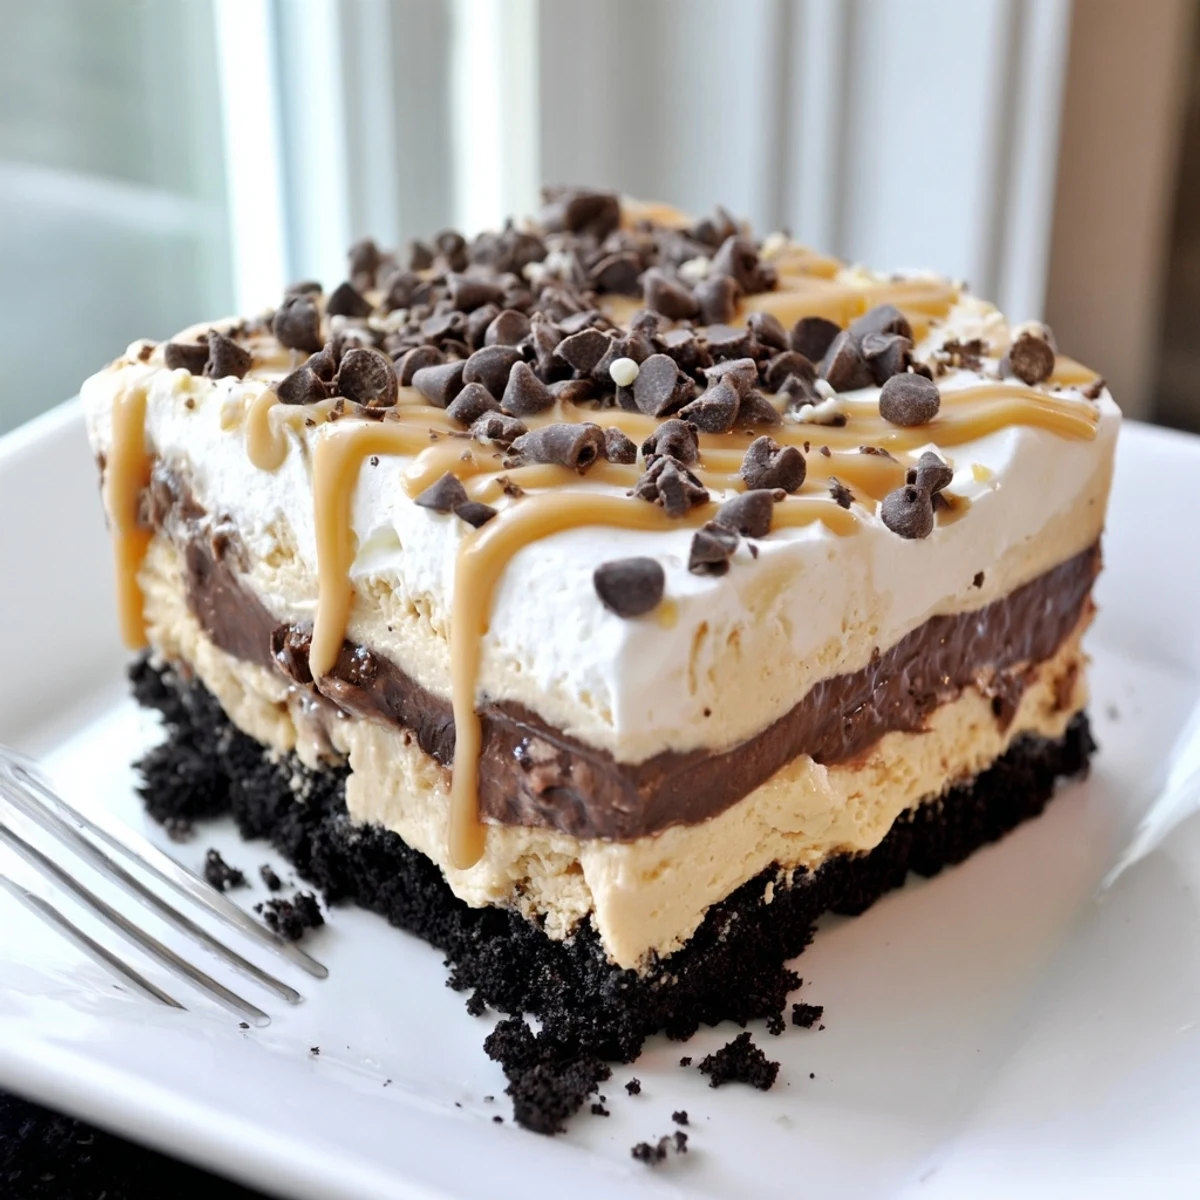
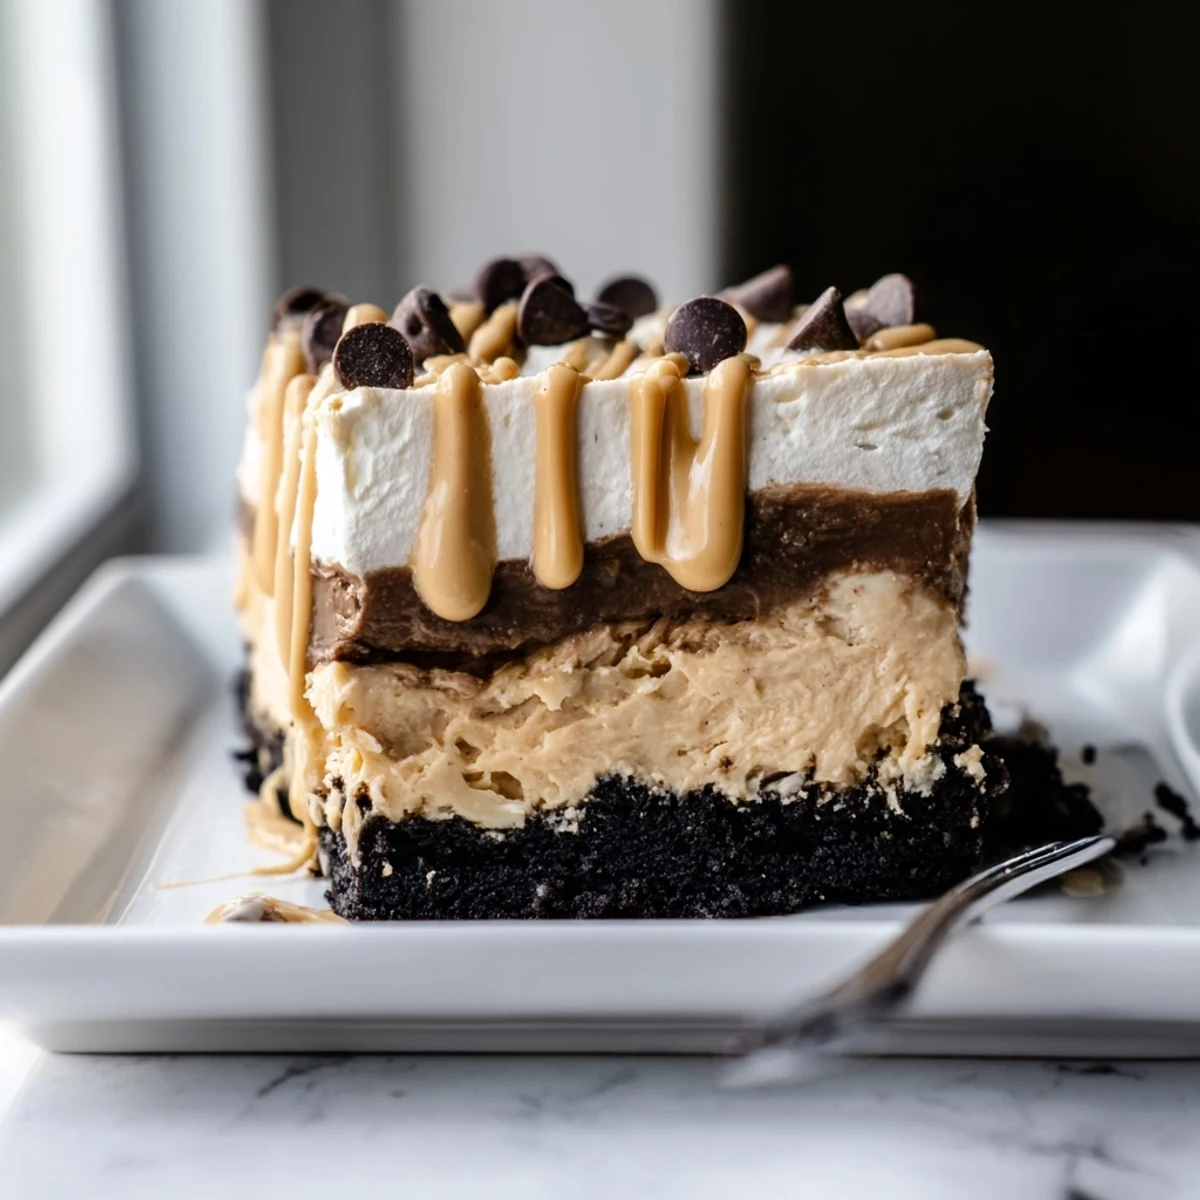
Save This no-bake peanut butter layered delight brings together a buttery chocolate cookie crust with a rich cream cheese and peanut butter filling, followed by a silky chocolate pudding layer all topped with fluffy whipped topping.
Ready in just 25 minutes of hands-on prep, it needs about 3 hours in the fridge to set properly. Each square delivers the classic combination of peanut butter and chocolate that everyone craves.
Perfect for potlucks, family gatherings, or whenever you want an impressive dessert without turning on the oven.
The smell of peanut butter and chocolate together has always been my weakness, and this layered delight is the proof. I threw it together one sweltering July afternoon when turning on the oven felt like a personal attack. Three hours of chilling felt like torture, but that first forkful silenced every complaint. Cool, creamy, and impossibly indulgent, it became my go-to dessert for every gathering that summer.
I brought a pan of this to a potluck at my friends apartment and watched three people go back for seconds before the main course was even served. One friend stood over the dish with her fork and said she was conducting quality control. That pan came home empty, and I received four text messages the next morning requesting the recipe.
Ingredients
- Chocolate sandwich cookies (200 g), crushed: These form a dark, slightly bitter foundation that balances all the sweetness above.
- Unsalted butter (75 g), melted: Binds the crumbs together so your crust holds firm when you slice.
- Cream cheese (225 g), softened: Let it sit out for thirty minutes so it blends without lumps.
- Creamy peanut butter (120 g): Use a standard commercial brand rather than natural for the smoothest texture.
- Powdered sugar (100 g): Sweetens the middle layer without any grainy bite.
- Whipped topping (480 ml total), thawed: Split between the peanut butter layer and the final topping for billowy richness.
- Instant chocolate pudding mix (100 g): The shortcut that makes you look like you worked far harder than you did.
- Cold milk (375 ml): Whole milk gives the pudding a denser, more luxurious set.
- Melted peanut butter (2 tbsp, optional): A drizzle on top makes it look bakery worthy with zero effort.
- Chocolate shavings or mini chips (optional): A little visual crunch goes a long way.
Instructions
- Build the crust:
- Toss the crushed cookies with melted butter until the mixture feels like damp sand. Press it firmly and evenly into your baking dish, then tuck it into the fridge to firm up while you move on.
- Whip up the peanut butter layer:
- Beat the cream cheese, peanut butter, and powdered sugar until completely smooth and no streaks remain. Gently fold in the whipped topping with a spatula, then spread this cloud of filling over the chilled crust.
- Make the chocolate pudding:
- Whisk the pudding mix and cold milk together for about two minutes until it thickens and coats the back of a spoon. Pour and spread it gently over the peanut butter layer, taking care not to disturb what is beneath.
- Finish the top:
- Spread the remaining whipped topping over the pudding in smooth swoops. Drizzle with melted peanut butter and scatter chocolate shavings if you are feeling fancy.
- Chill patiently:
- Cover the dish and refrigerate for at least three hours so every layer sets properly. Overnight is even better if you can stand the wait.
- Slice and serve:
- Use a sharp knife to cut clean squares, wiping the blade between cuts for the neatest presentation. Serve chilled and watch them disappear.
 Save
Save The beauty of this dessert is how it transforms something as humble as sandwich cookies and instant pudding into an event. I have watched people close their eyes on the first bite every single time I serve it.
Making It Your Own
Sprinkle chopped roasted peanuts between the peanut butter layer and the pudding for a welcome snap of crunch. You could also swap the chocolate cookies for graham crackers if you want a lighter, toastier base. Homemade whipped cream works beautifully in place of whipped topping and adds a more authentic dairy richness.
What to Serve Alongside
A glass of ice cold milk is the obvious companion, but a pour of sweet dessert wine elevates this into something surprisingly elegant. I once served small squares alongside strong coffee at a dinner party and the bitter contrast made every layer taste more alive. Keep the portions modest because this dessert is rich and a little goes a long way.
Storage and Make Ahead Advice
This dessert actually improves after a night in the fridge because the flavors deepen and the layers settle into each other. Cover it tightly with plastic wrap and it will keep beautifully for up to three days.
- Freeze individual squares wrapped tightly for up to one month and thaw them in the fridge before serving.
- Avoid freezing with the whipped topping layer on top because the texture can become watery when thawed.
- Always use a clean knife for each cut to keep the slices looking sharp and appetizing.
 Save
Save Some desserts demand effort and precision, but this one simply asks for a little patience while the fridge works its magic. Share it with people who appreciate the classics and watch it become a requested favorite.
Recipe FAQs
- → Can I make this dessert ahead of time?
-
Yes, this dessert actually benefits from being made ahead. You can prepare it up to 24 hours in advance and keep it covered in the refrigerator. The layers set beautifully and the flavors meld together overnight.
- → What can I substitute for whipped topping?
-
You can use homemade whipped cream made from heavy whipping cream sweetened with powdered sugar and a splash of vanilla. Use about 2 cups of heavy cream whipped to stiff peaks for each 240 ml portion called for in the instructions.
- → How do I get clean slices when cutting?
-
Use a sharp knife and wipe it clean between each cut. Running the knife under hot water, then drying it before each slice, helps achieve neat squares. Chilling the dessert for the full 3 hours also ensures firmer, cleaner slices.
- → Can I use natural peanut butter instead of creamy?
-
Traditional creamy peanut butter works best for the smooth texture needed in the filling layer. Natural peanut butter tends to separate and can make the layer oily or grainy. If using natural peanut butter, stir it very thoroughly before measuring.
- → How should leftovers be stored?
-
Cover the baking dish tightly with plastic wrap or transfer individual squares to an airtight container. Store in the refrigerator for up to 3 days. The cookie crust may soften slightly over time but the dessert remains delicious.
- → Is there a way to make this gluten-free?
-
Simply swap the chocolate sandwich cookies for a gluten-free alternative. Many brands offer gluten-free chocolate sandwich cookies that work perfectly for the crust. Also verify that the pudding mix is certified gluten-free.
