 Save
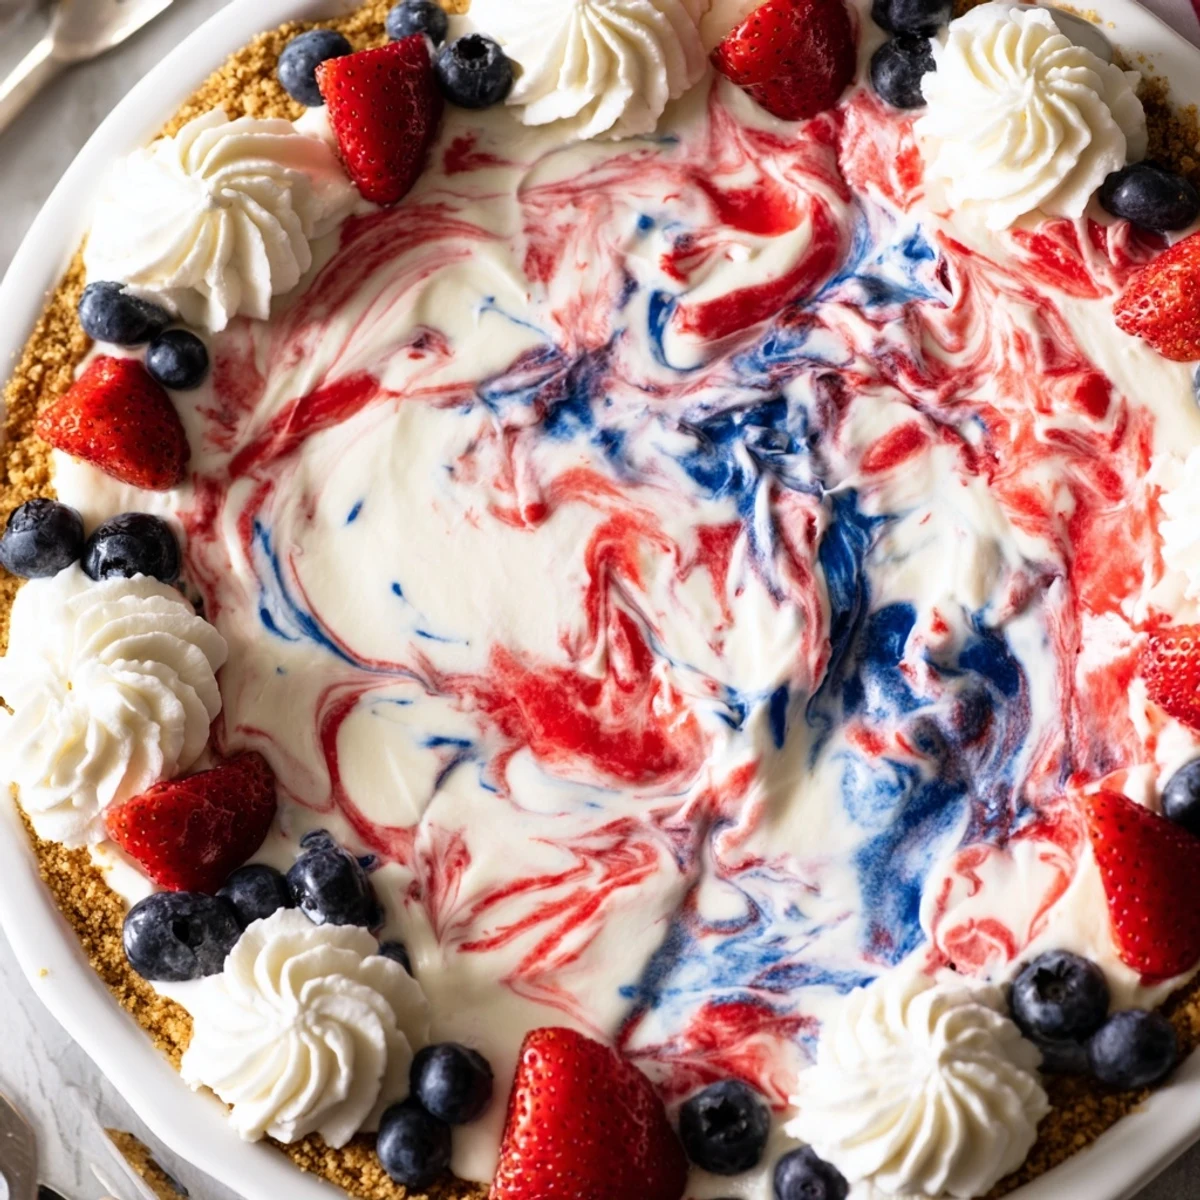
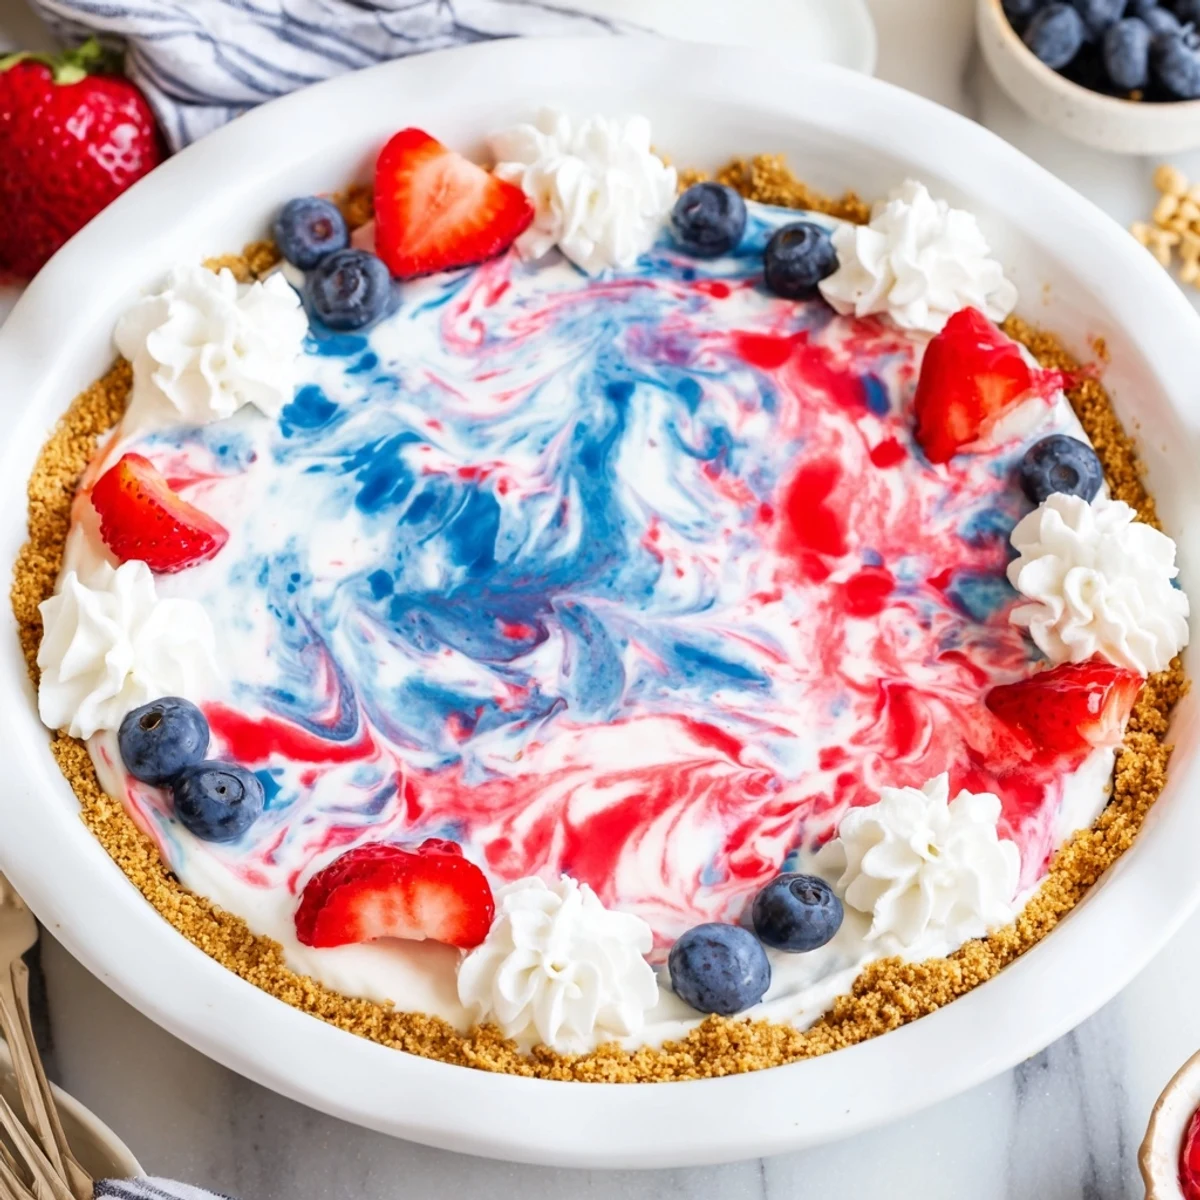
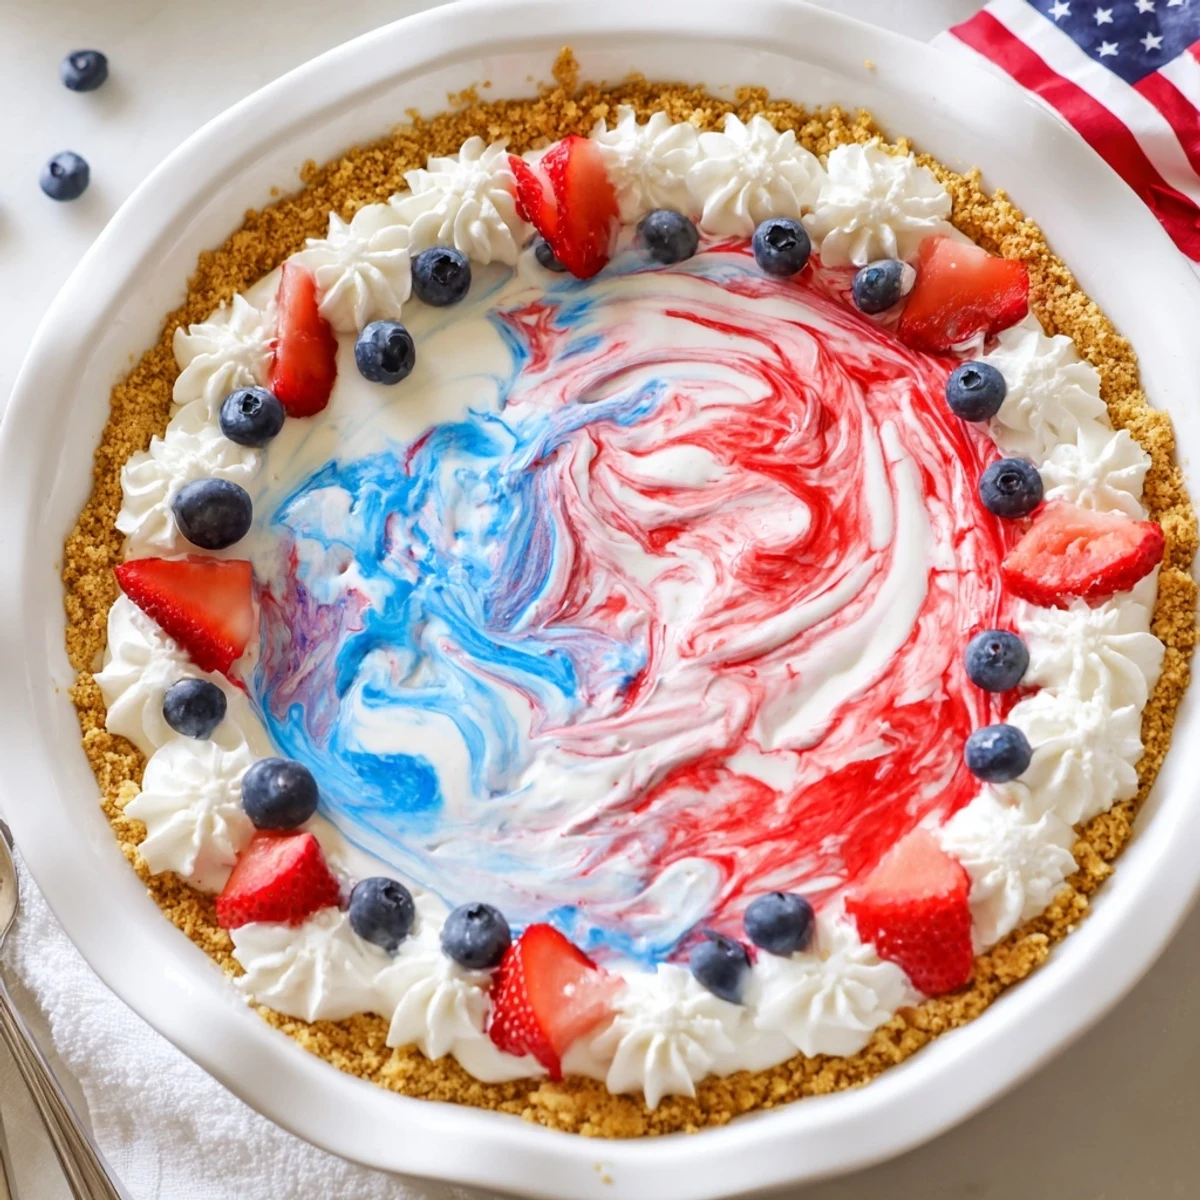
Save This chilled pie layers a smooth cream cheese–sour cream filling whipped with cold heavy cream, divided and tinted to create red, white and blue swirls over a baked graham cracker crust. Bake the crust briefly, whip cream to stiff peaks and fold gently to retain air, then drop dollops of each color and swirl with a skewer. Refrigerate until firmly set and garnish with fresh berries before serving.
Fourth of July desserts are usually about flag-shaped cakes or berry trifles, but the first time I set out to make this Red White And Blue Swirl Pie, it was partly out of sheer curiosity. I could imagine the ripples of color coming together like a sparkler trail, and I wanted something dramatic enough for a backyard celebration but low-stress. Mixing bold colors into a creamy filling was unexpectedly playful—the kind of kitchen fun where you forget about measuring perfection for a second and let yourself swirl. The aroma of sweet cream and toasty crust, mingling as I worked, turned a holiday project into a happy jumble of anticipation.
We had this pie on a breezy evening with friends, the soundtrack just the clink of forks and the chorus of who gets the bluest slice. I’ll never forget seeing someone sneak their finger through the whipped cream while pretending to “even it out.” It was one of those rare moments when dessert, laughter, and good company felt perfectly matched. Little did I know a pie could be such a conversation starter.
Ingredients
- Graham cracker crumbs: These give the crust its signature honeyed crunch, and I’ve learned that pulsing them super-fine makes the base sturdier.
- Granulated sugar: Just enough to make the crust taste like a treat, not just a vessel—don’t skip it.
- Unsalted butter, melted: The trick to getting that sandy texture to come together; give it a minute to cool before mixing so your hands don’t get scorched.
- Cream cheese, softened: The backbone of the creamy filling—let it come to room temp for ultimate silkiness (cold cream cheese loves to clump).
- Powdered sugar: It melts right in for smoothness, without graininess; sifting it helps if you’re feeling fancy.
- Sour cream: Adds a subtle tang and keeps the filling from being too sweet or heavy.
- Vanilla extract: Don’t eyeball this one—good vanilla makes all the difference.
- Heavy whipping cream, cold: Whip it cold for thick, stable peaks; warm cream just turns gloopy.
- Red and blue gel food coloring: A little goes a long way for vibrant swirls; liquid food coloring will muddy the creaminess.
- Fresh strawberries, blueberries, whipped cream (optional): For decorating and that extra pop—if you’re short on time, just a few scattered berries look great.
Instructions
- Prep your crust:
- Stir together graham crumbs, sugar, and melted butter until every bit feels like moist sand, then firmly press the mix across the bottom and up the sides of your pie dish.
- Bake the base:
- Let it bake for a quick 8 to 10 minutes until it’s lightly golden and smells deeply toasty—don’t overdo it or the crust toughens up.
- Make the creamy filling:
- Beat softened cream cheese until super smooth; add powdered sugar, sour cream, and vanilla, then keep mixing until it’s fluffy and sweetly aromatic.
- Whip the cream:
- In a separate bowl, whip that cold heavy cream until billowy, then gently fold it into the cream cheese base, keeping as much airiness as possible.
- Divide and color:
- Spoon your mixture into three bowls; leave one white, add red gel coloring to another, blue to the third, and mix until each color sings.
- Swirl it up:
- Spoon blobs of each color onto your cooled crust in a haphazard patchwork, then use a skewer or knife to ripple them together—just enough to marble, not blend.
- Chill to set:
- Once swirled, even the surface a little, then pop it in the fridge and forget about it for at least two hours (overnight is even better).
- Finish and decorate:
- Right before serving, heap whipped cream, berries, or both on top—sometimes the less “styled,” the prettier the result.
 Save
Save I still laugh thinking about the first time I brought this pie to a family picnic—every kid tried to call dibs on which color was “the best flavor,” not realizing it was all one dreamy bite. My aunt even asked for the “recipe for the blue stuff,” which is now family code for anything wildly colorful and celebratory. Meaningful moments can start with something as simple as swirling colors into a pie. Sometimes it just takes a shared dessert to pull everyone in together.
How to Get That Perfect Swirl
After a few attempts, I found that dropping generous spoonfuls of each color in slightly overlapping patches works best—if you get nervous, just trust the potential chaos! My favorite tool is actually a bamboo skewer because it has a little more control than a knife, and you don’t want to dig too deep or scrape up crumbs. If you like big, bold marbles, use wider swoops; for finer streaks, use the tip lightly. Most of the time, less swirling is more magical.
Shortcut Secrets for Busy Bakers
Sometimes I swap out the homemade crust for a store-bought graham one when I’m pressed for time, and honestly, no one’s ever complained. If food coloring feels intimidating, just do one swirl and leave the rest neutral for a modern look—it still wows. I’ve learned you can prep the filling the night before, then just color and swirl the next day, which saves mess and stress.
Make It Your Own: Swaps and Fun Ideas
You can switch up the colors based on whatever holiday or mood strikes—think green and gold for St. Paddy’s day, or pink and purple for a birthday. If you’re feeling extra, fold chopped berries into the filling for little surprise bites. There’s no wrong way to decorate—pile on sprinkles, edible flowers, or crushed cookies for more personality.
- If you have less than two hours to chill, pop the pie in the freezer (just not overnight so it doesn’t get icy).
- Use large drops of color for bold streaks or smaller ones for a subtle effect.
- Clean the knife or skewer between swirls for vivid contrast in your marbling.
 Save
Save This pie is pure celebration, no matter the reason or season. I hope it brings as many smiles and giggles to your table as it has to mine.
Recipe FAQs
- → How do I get the most vibrant red and blue colors?
-
Use gel or paste food coloring rather than liquid; it provides intense color without thinning the filling. Add a small amount, mix until evenly tinted, and adjust gradually to reach the shade you want.
- → How can I avoid overmixing the whipped filling?
-
Fold the whipped cream into the cream cheese mixture with a spatula using gentle strokes. Stop once there are no large streaks; overmixing deflates the air and yields a denser texture.
- → Can I make the crust gluten-free?
-
Yes. Swap graham crackers for a certified gluten-free graham or cookie crumb and use the same ratio of crumbs to butter. Press and bake as usual to set the base.
- → How long should the pie chill before serving?
-
Chill at least 2 hours to allow the filling to firm up, though chilling overnight produces a firmer texture and cleaner slices.
- → What’s the best way to achieve stiff peaks with heavy cream?
-
Start with very cold heavy cream and a chilled bowl, whip at medium-high speed until soft peaks form, then continue briefly until peaks hold and stand upright without collapsing.
- → How should leftovers be stored and how long do they keep?
-
Cover tightly and refrigerate; the pie keeps well for 3–4 days. Add fresh berries just before serving to maintain their texture and color.
