 Save
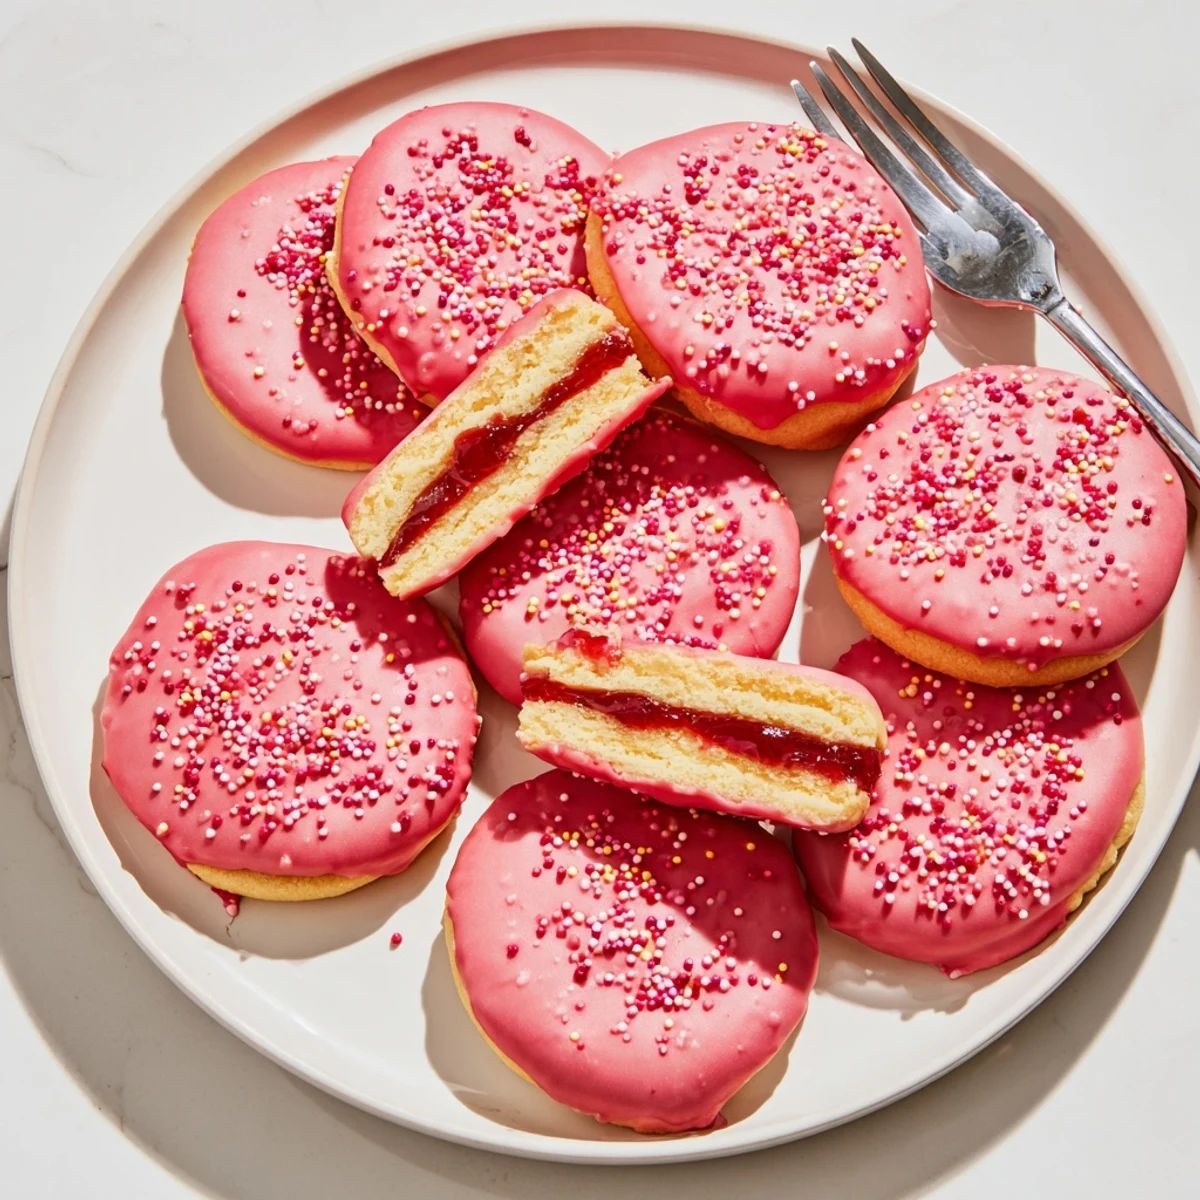
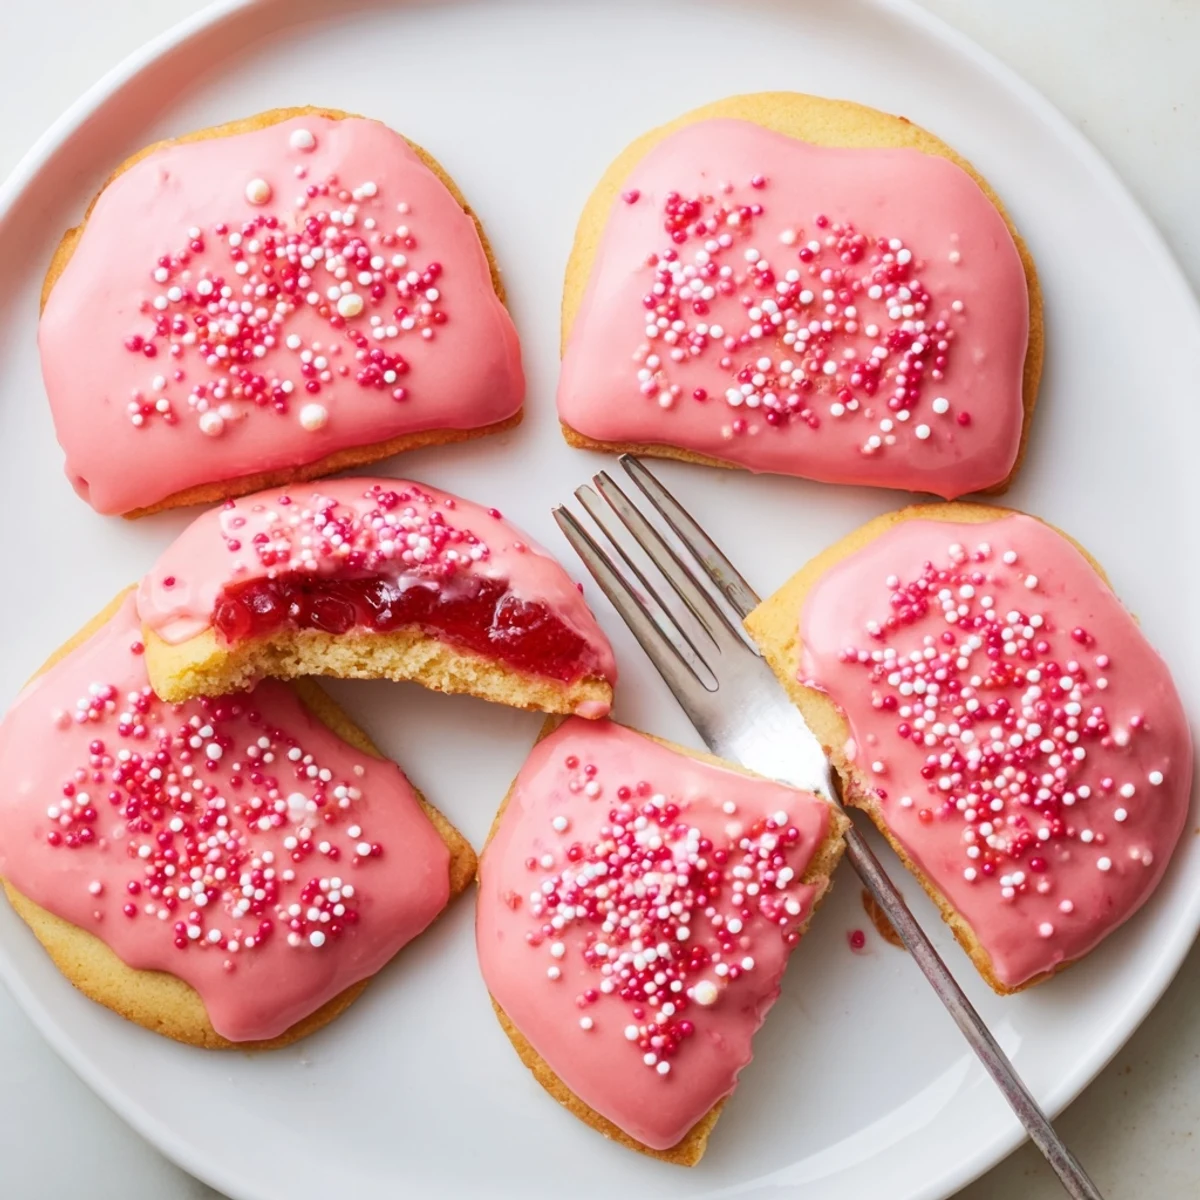
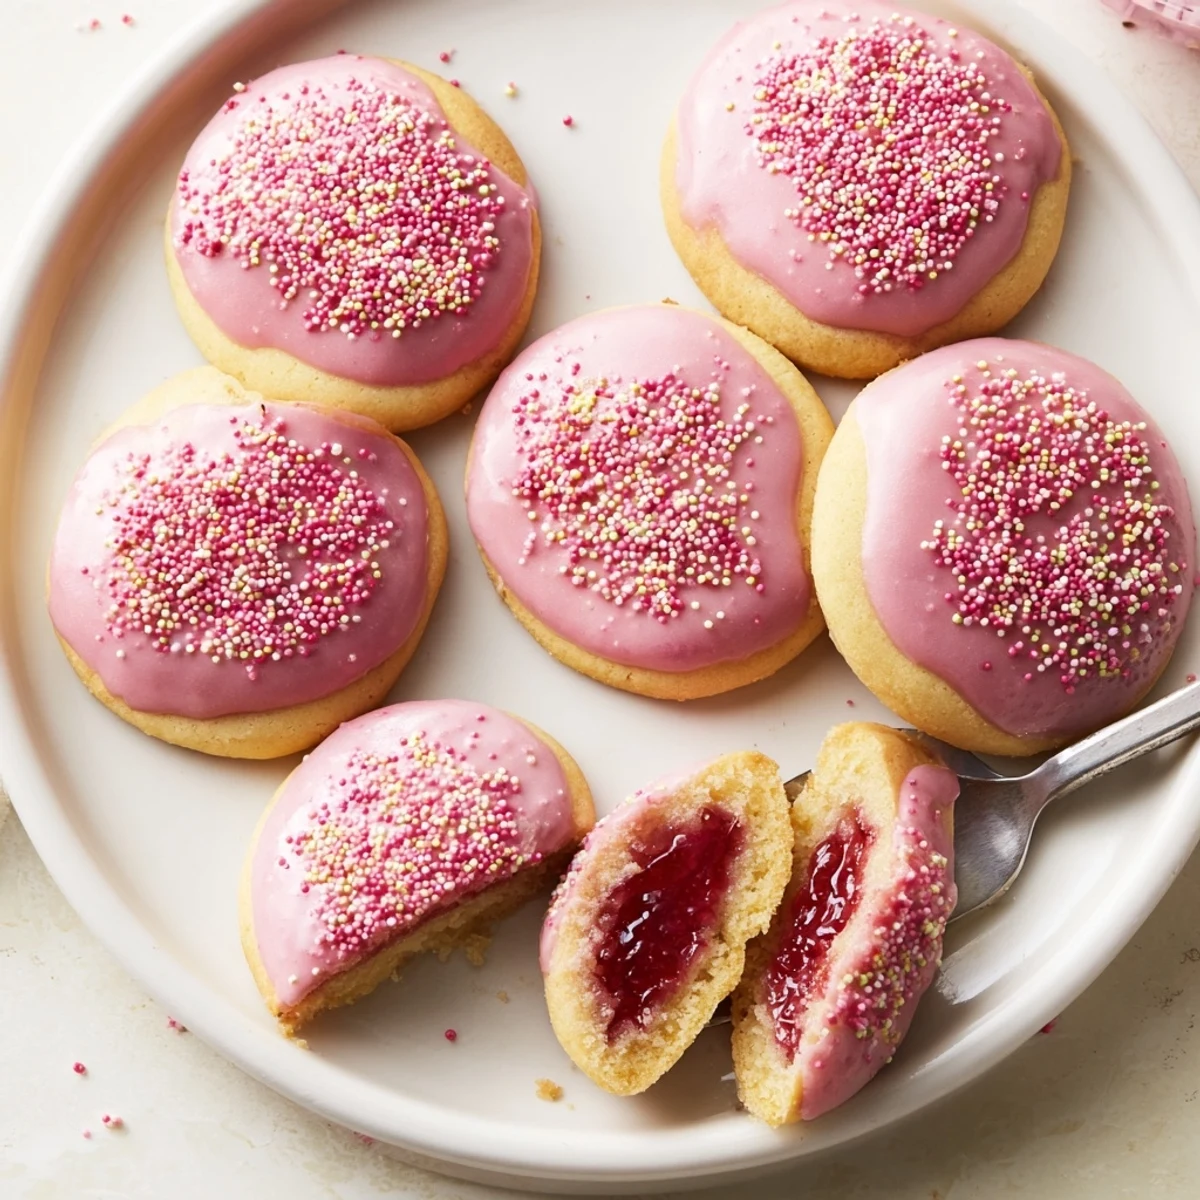
Save These soft, buttery sugar cookies capture everything you love about strawberry Pop-Tarts in handheld form. Each tender cookie is wrapped around a center of sweet strawberry jam, then baked until golden and finished with a drizzle of vanilla glaze and plenty of colorful sprinkles.
The dough comes together quickly with standard pantry ingredients, and the assembly method—flattening discs, adding jam, and sealing—creates that signature filled pastry look. The result is a playful treat that's perfect for dessert, lunchboxes, or whenever you want something nostalgic and fun.
You can easily customize these by swapping in raspberry, blueberry, or apricot preserves. Just let them cool completely before glazing so the icing sets beautifully with those signature sprinkles on top.
My kitchen still smells like a birthday party from 1998, and I blame the strawberry jam bubbling out of these cookies. There is something absurdly satisfying about cramming the flavor of a foil wrapped toaster pastry into a soft, jam filled cookie. These came together one rainy Tuesday when my grocery haul included both cookie ingredients and a jar of strawberry preserves I had no plan for. Twenty cookies later, I was texting photos to everyone I know.
I brought a plate of these to a potluck and watched three adults abandon conversation mid sentence to grab seconds. My friend Diego held one up to the light like he was inspecting a gemstone and said the glaze alone was worth the visit. That reaction is now the bar I measure every new cookie against.
Ingredients
- All purpose flour (2 1/4 cups, 280 g): The backbone of the dough, and scooping with a spoon before leveling prevents dense, heavy cookies.
- Baking powder (1/2 teaspoon): Just enough lift to keep these soft without turning them cakey.
- Salt (1/2 teaspoon): Balances the sweetness and makes the strawberry flavor pop in a way you would notice if it were missing.
- Unsalted butter, softened (3/4 cup, 170 g): Room temperature butter creams properly and traps air, which is what gives these cookies their tender chew.
- Granulated sugar (3/4 cup, 150 g): Provides clean sweetness and helps the edges crisp slightly while the centers stay soft.
- Light brown sugar (1/4 cup, 50 g): A small amount adds warmth and moisture that white sugar alone cannot achieve.
- Large eggs (2): Bind everything together and add richness to the dough.
- Vanilla extract (2 teaspoons): Rounds out the buttery flavor and makes the whole kitchen smell incredible while mixing.
- Strawberry jam or preserves (3/4 cup, 210 g): The heart of the cookie, and using a good quality jam with real fruit pieces makes a noticeable difference.
- Powdered sugar (1 cup, 120 g): Creates a smooth, dippable glaze that sets into a soft icing.
- Milk (2 tablespoons): Thins the powdered sugar into a drizzleable consistency without watering it down.
- Vanilla extract (1/2 teaspoon): Adds depth to the glaze so it does not taste like plain sugar.
- Pink or red food coloring (optional): A drop or two gives the glaze that playful Pop Tart look that makes people smile before they even take a bite.
- Sprinkles: Pure decoration, totally optional, and yet somehow essential to the whole experience.
Instructions
- Get your oven ready:
- Preheat to 350°F (175°C) and line two baking sheets with parchment paper so the cookies lift off cleanly every time.
- Whisk the dry team:
- In a medium bowl, whisk together the flour, baking powder, and salt until evenly distributed and free of lumps.
- Cream the butter and sugars:
- In a large bowl, beat the softened butter, granulated sugar, and brown sugar with an electric mixer until the mixture turns pale and fluffy, about two to three minutes.
- Add eggs and vanilla:
- Beat in one egg at a time, letting each fully incorporate before adding the next, then pour in the vanilla and mix until fragrant.
- Bring the dough together:
- Gradually add the dry ingredients to the wet mixture on low speed, stopping as soon as you see no more streaks of flour.
- Stuff and shape the cookies:
- Scoop two tablespoon portions of dough, flatten each into a disc in your palm, place a teaspoon of jam in the center, fold the dough over the jam, pinch the edges to seal well, and roll gently into a ball.
- Arrange on baking sheets:
- Place the filled dough balls on the prepared sheets two inches apart because they spread and you do not want them merging into one giant jam cookie.
- Bake until just right:
- Bake for eleven to thirteen minutes until the edges look set but the centers still appear slightly underbaked, then let them rest on the sheet for five minutes before moving to a wire rack.
- Glaze and celebrate:
- Whisk the powdered sugar, milk, vanilla, and food coloring if using until smooth, drizzle generously over the completely cooled cookies, and scatter sprinkles on top before the glaze sets.
 Save
Save The moment these cooled and I added that pink glaze, my counter looked like a candy shop had collided with a bakery and I was not mad about it.
Storage That Actually Works
Keep these in an airtight container at room temperature and they stay soft for up to four days, though in my house they rarely survive past day two. If you stack them, place a sheet of parchment between layers so the glaze does not smear onto the bottom of the cookie above it. The jam filling stays moist and the cookies actually taste better on day two when the flavors have had time to settle into each other.
Jam Swaps Worth Trying
Raspberry jam is the easiest swap and tastes slightly tarter, which cuts through the sweet glaze beautifully. Apricot preserves give a golden, mellow sweetness that feels more like a fancy pastry than a childhood throwback. Blueberry jam works too but tends to be runnier, so chill it in the fridge for fifteen minutes before spooning it into the dough so it holds its shape during baking.
Tools You Will Want Handy
A standard cookie scoop makes portioning the dough fast and consistent, which matters more here than with most cookies because uneven sizes mean uneven baking times. An electric mixer saves your arm during the creaming step, though a sturdy whisk and determination will get you there too.
- Parchment paper is non negotiable unless you enjoy chiseling jam off metal pans.
- A wire cooling rack prevents soggy bottoms by letting air circulate underneath.
- Two baking sheets let you work in batches without rushing to scoop while the first tray is still hot.
 Save
Save These cookies are pure joy on a plate, and every single person who tastes them will ask when you are making them again.
Recipe FAQs
- → Can I use different jam flavors?
-
Absolutely! Raspberry, blueberry, apricot, or even mixed berry preserves work wonderfully. Choose your favorite jam or whatever you have in the pantry.
- → How do I prevent the jam from leaking during baking?
-
Make sure to pinch the dough tightly around the jam and seal it well. Avoid overfilling—stick to about 1 teaspoon per cookie. If some jam escapes, don't worry, they'll still taste delicious.
- → Can I freeze the dough?
-
Yes! You can freeze the assembled, filled dough balls before baking. Place them on a baking sheet to freeze individually, then transfer to a freezer bag. Bake from frozen, adding 1-2 minutes to the baking time.
- → Why do the centers look slightly underbaked?
-
This is intentional! Removing cookies when centers look slightly underbaked ensures they stay soft and tender. They continue cooking on the hot baking sheet during those 5 minutes of cooling time.
- → How long do these stay fresh?
-
Store in an airtight container at room temperature for up to 4 days. For longer storage, freeze the unglazed cookies and thaw before adding the glaze and sprinkles.
- → Can I make these without a mixer?
-
Yes! You can cream the butter and sugars by hand with a sturdy spoon and some elbow grease. It may take a few extra minutes to achieve that light, fluffy texture.
