 Save
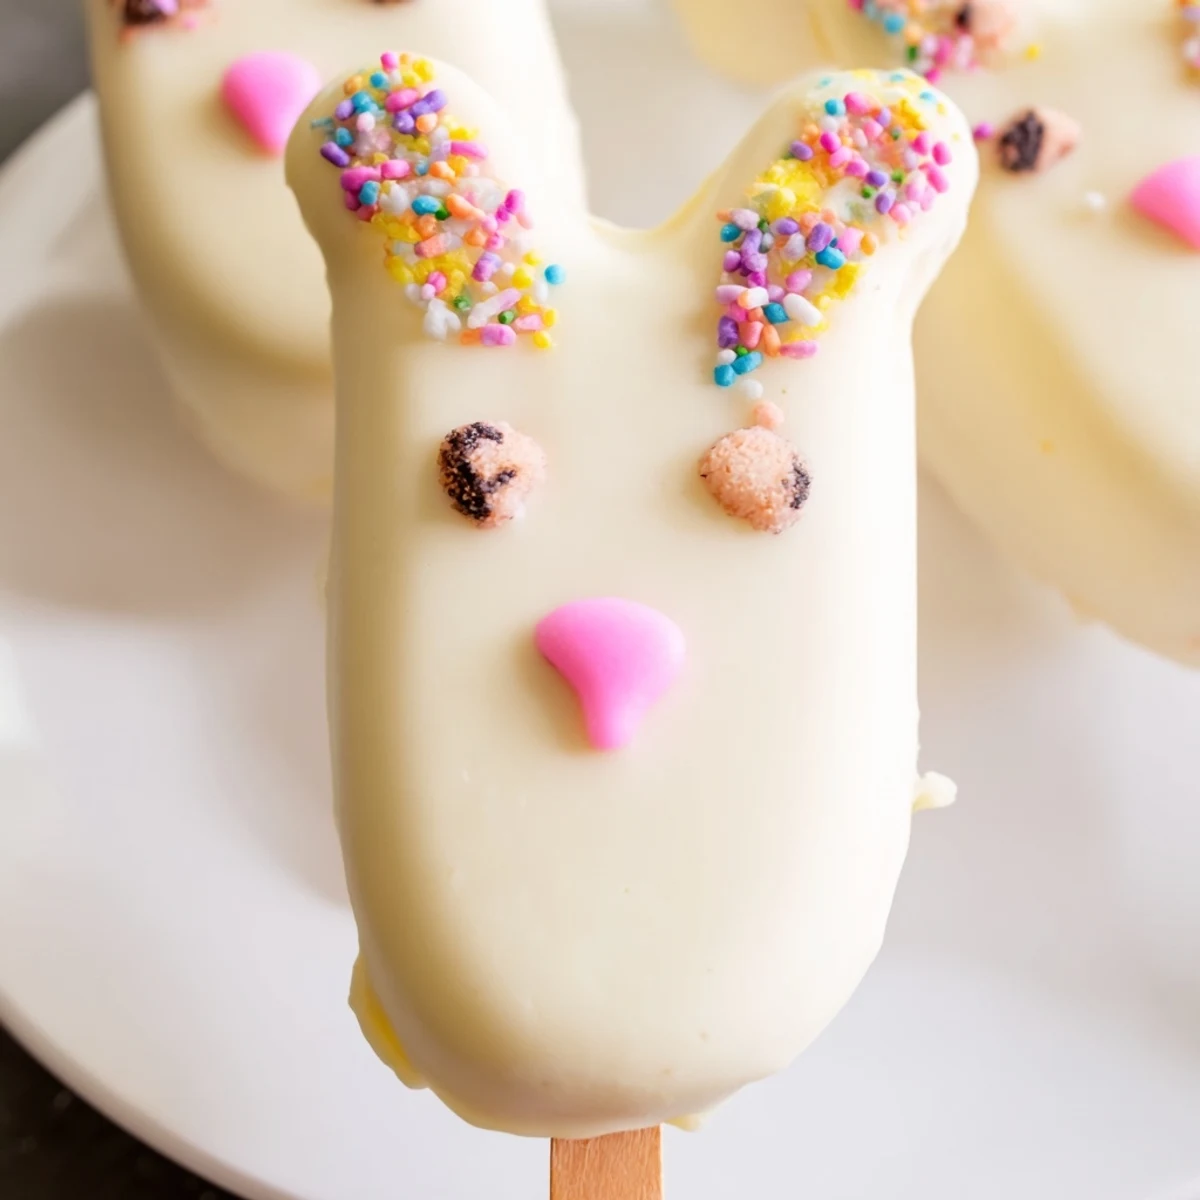
Save Transform simple vanilla cake crumbs into charming bunny-shaped treats perfect for Easter entertaining. These handheld desserts feature a rich, doughy cake center blended with cream cheese and butter, then generously coated in smooth white chocolate. The preparation involves mixing the crumb mixture, shaping into bunny faces, inserting sticks, and dipping into melted chocolate.
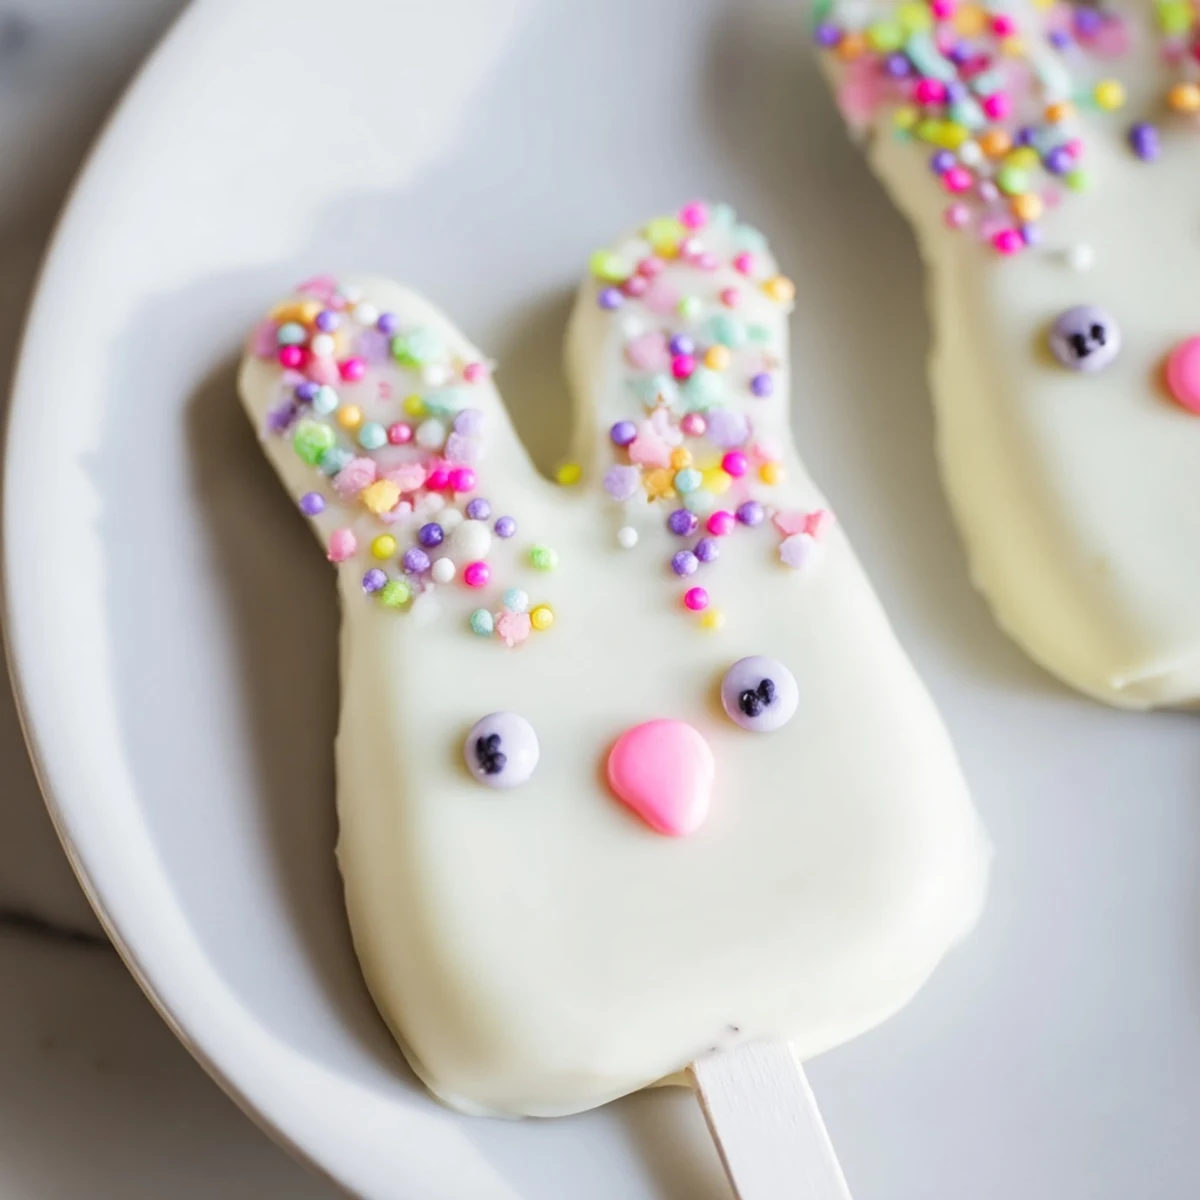
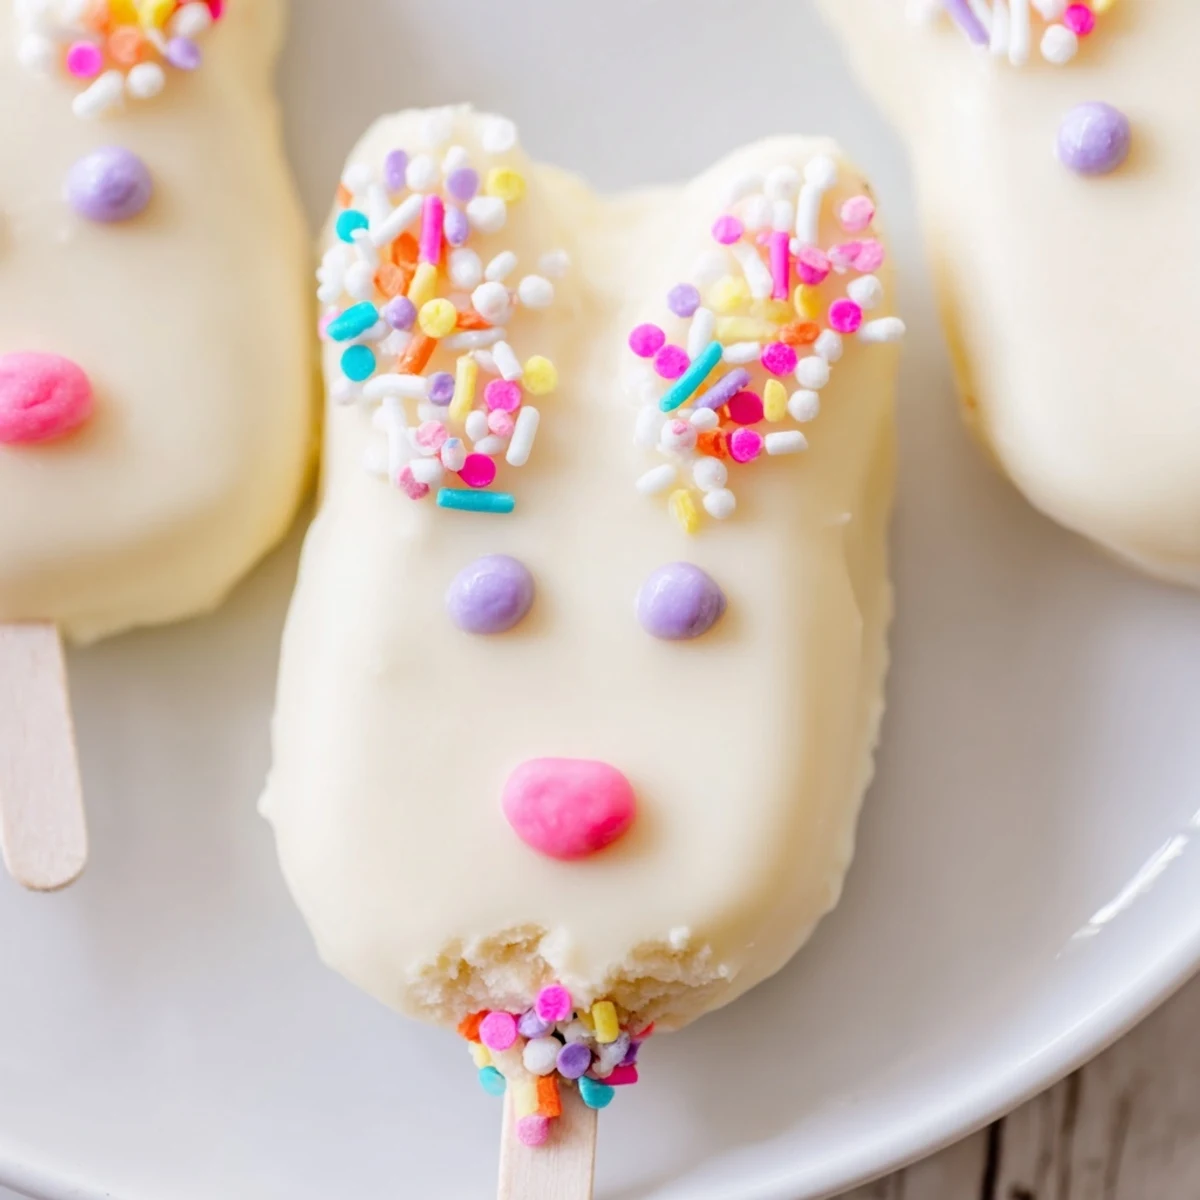
Decoration possibilities are endless—use candy eyes, fondant ears, edible gel coloring, or sprinkles to create unique personalities for each bunny. The process takes just over an hour from start to finish and yields eight delightful treats. These handheld sweets are ideal for Easter baskets, dessert tables, or classroom celebrations. Children love helping shape and decorate these festive goodies.
Variation options include different cake flavors like chocolate or lemon, or swirling pink coloring into the white coating for a marbled effect. Properly stored, these remain fresh for three days, making them perfect for advance preparation.
The kitchen counter was covered in white chocolate splatters and my daughter was already wearing more of it on her face than we had actually managed to get onto the cakesicles themselves.
My neighbor brought over a batch last Easter and I literally could not stop thinking about them for weeks until I finally forced myself to recreate the magic in my own tiny kitchen.
Ingredients
- Vanilla cake crumbs: These form the base of your cakesicle and using day old cake or cupcakes works beautifully
- Cream cheese and butter: These bind everything together into a perfectly moldable dough
- Powdered sugar: Adds just the right amount of sweetness to the cake mixture
- Vanilla extract: Deepens the overall flavor profile
- White chocolate: Creates the gorgeous snowy coating that makes these bunnies so striking
- Edible gel food coloring: Perfect for adding those precious pink noses and ears
- Cakesicle sticks: Transform these into actual popsicles that are easy to serve and eat
Instructions
- Mix the cake base:
- Combine the cake crumbs with cream cheese butter powdered sugar and vanilla in a medium bowl until you achieve a dough that holds together beautifully when squeezed
- Shape the bunnies:
- Divide the mixture into eight equal portions then form each into a flattened oval with slightly pointed tops to resemble bunny faces
- Add the sticks:
- Gently insert a cakesicle stick into the bottom of each shape pressing carefully to secure it without squishing your perfect bunny
- Chill the shapes:
- Refrigerate the formed cakesicles for at least twenty to thirty minutes until they are firm enough to handle without breaking
- Melt the white chocolate:
- Heat the white chocolate in thirty second intervals in the microwave stirring between each burst until completely smooth and fluid
- Coat the bunnies:
- Dip each chilled cake pop into the melted chocolate swirling gently to coat completely then tap off any excess chocolate
- Decorate immediately:
- While the chocolate is still soft add candy eyes sprinkles or fondant ears and noses to bring your bunnies to life
- Set and serve:
- Let the cakesicles set completely at room temperature or pop them in the fridge briefly to speed up the process before serving
 Save
Save Watching my nieces and nephews carefully choose their own bunny from the platter was the moment I knew these had become a family tradition not just another recipe.
Making These Ahead
You can prepare the cake mixture and shape the bunnies up to two days in advance storing them tightly wrapped in the refrigerator until you are ready to dip and decorate.
Fun Flavor Variations
Swap vanilla cake for chocolate or lemon cake crumbs to completely transform the flavor profile while keeping the adorable bunny presentation intact.
Presentation Ideas
Display these in a decorated container filled with edible grass or arrange them standing up in a decorated foam block for a stunning centerpiece.
- Use pastel sprinkles for an extra Easter touch
- Tie small ribbons around the sticks for gift giving
- Package individual cakesicles in clear bags for party favors
 Save
Save There is something incredibly satisfying about turning cake scraps into these charming Easter treats that bring smiles to everyone who sees them.
Recipe FAQs
- → What type of cake works best for these bunny treats?
-
Vanilla cake crumbs create the perfect base, but chocolate or lemon cake offer delicious variations. Use homemade leftovers, store-bought cake, or cupcakes crumbled into fine pieces. The texture should be moist but not wet, allowing the mixture to hold its shape when formed.
- → How do I prevent the coating from cracking?
-
Ensure your shaped cake centers are thoroughly chilled before dipping—the cold prevents the warm coating from seizing. Melt white chocolate slowly in 30-second intervals, stirring frequently. Avoid overheating, which causes the chocolate to become brittle and crack upon setting.
- → Can I make these ahead of time?
-
Absolutely. Complete the shaping and dipping steps up to two days before your event. Store finished treats in an airtight container in the refrigerator, placing wax paper between layers. The coating maintains its shine, and flavors develop beautifully over time.
- → What decorating tools do beginners need?
-
Candy eyes and pre-made fondant shapes simplify decoration. Use edible gel food coloring with small brushes for details. Sprinkles add instant charm without requiring artistic skill. A simple piping bag with colored coating works for adding noses or whiskers.
- → How should I store these decorated treats?
-
Keep finished treats in an airtight container at cool room temperature for up to two days, or refrigerate for three days. Humidity may cause the white coating to become sticky, so avoid storing in the bathroom or near steam. Let chilled treats come to room temperature before serving for optimal flavor.
- → Can I substitute candy melts for real white chocolate?
-
Yes, candy melts or white chocolate coating wafers work beautifully and often produce smoother results for dipping. They're formulated to set firmly without tempering. However, real white chocolate offers superior flavor. Choose based on your priority—ease of working or taste preference.
