 Save
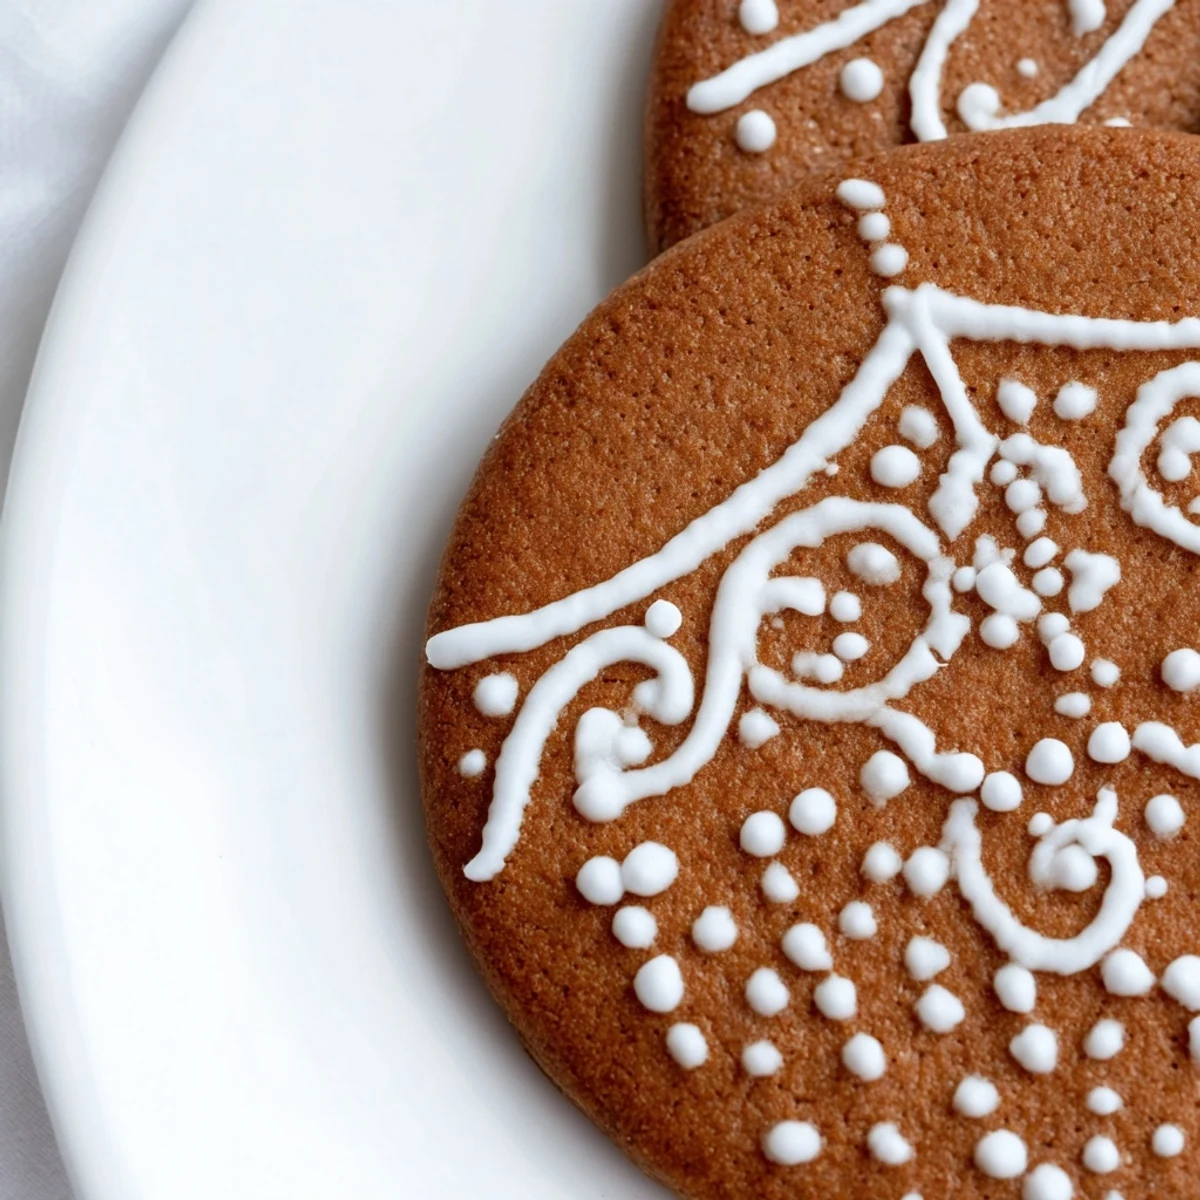
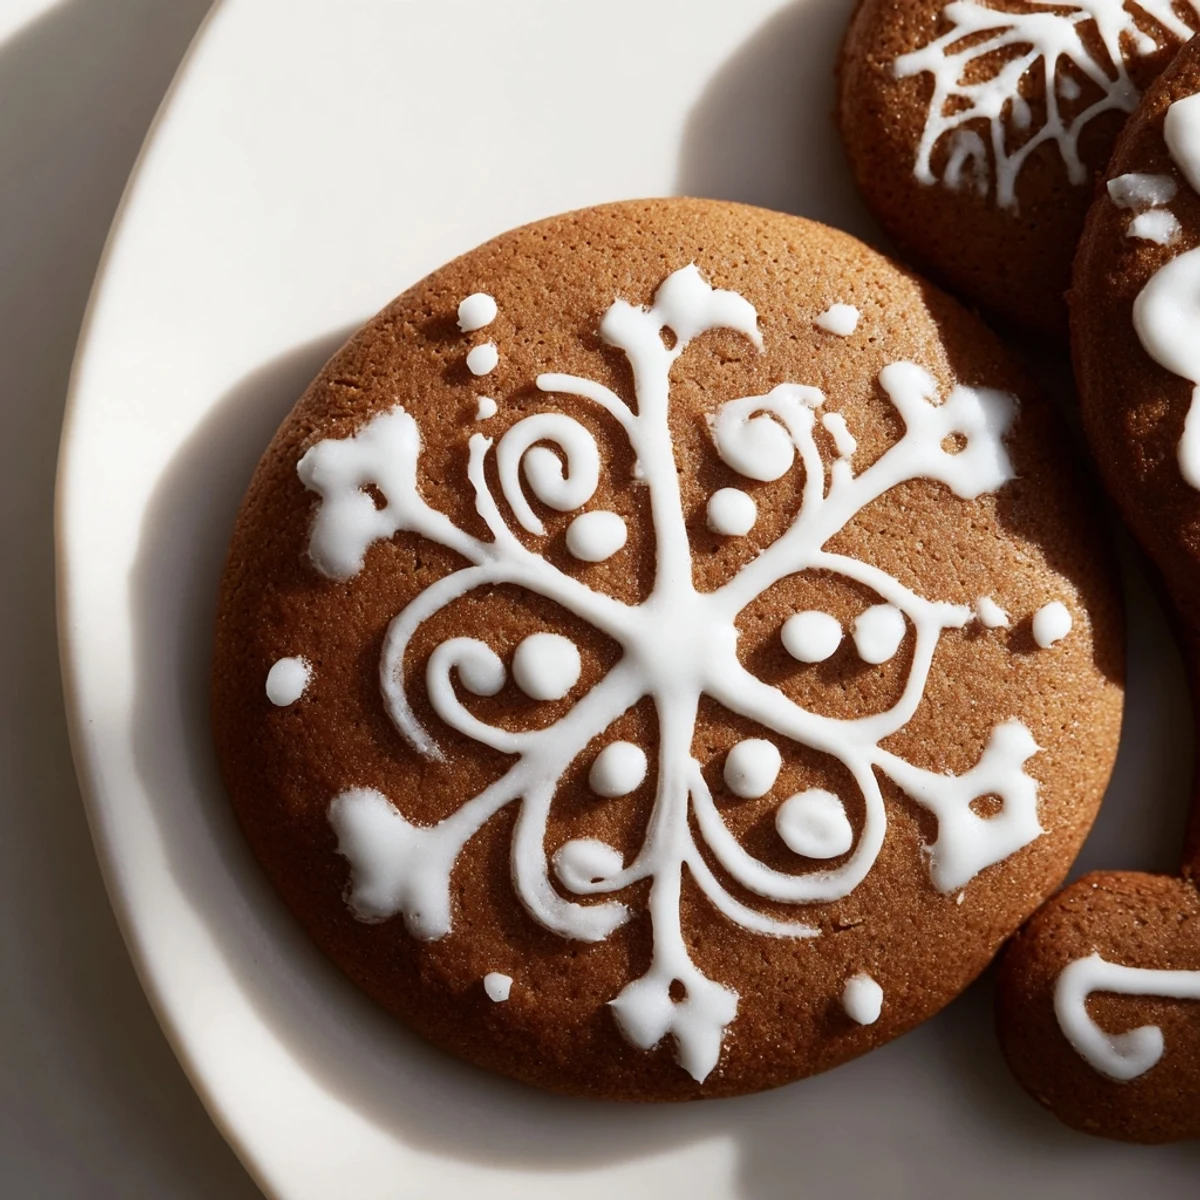
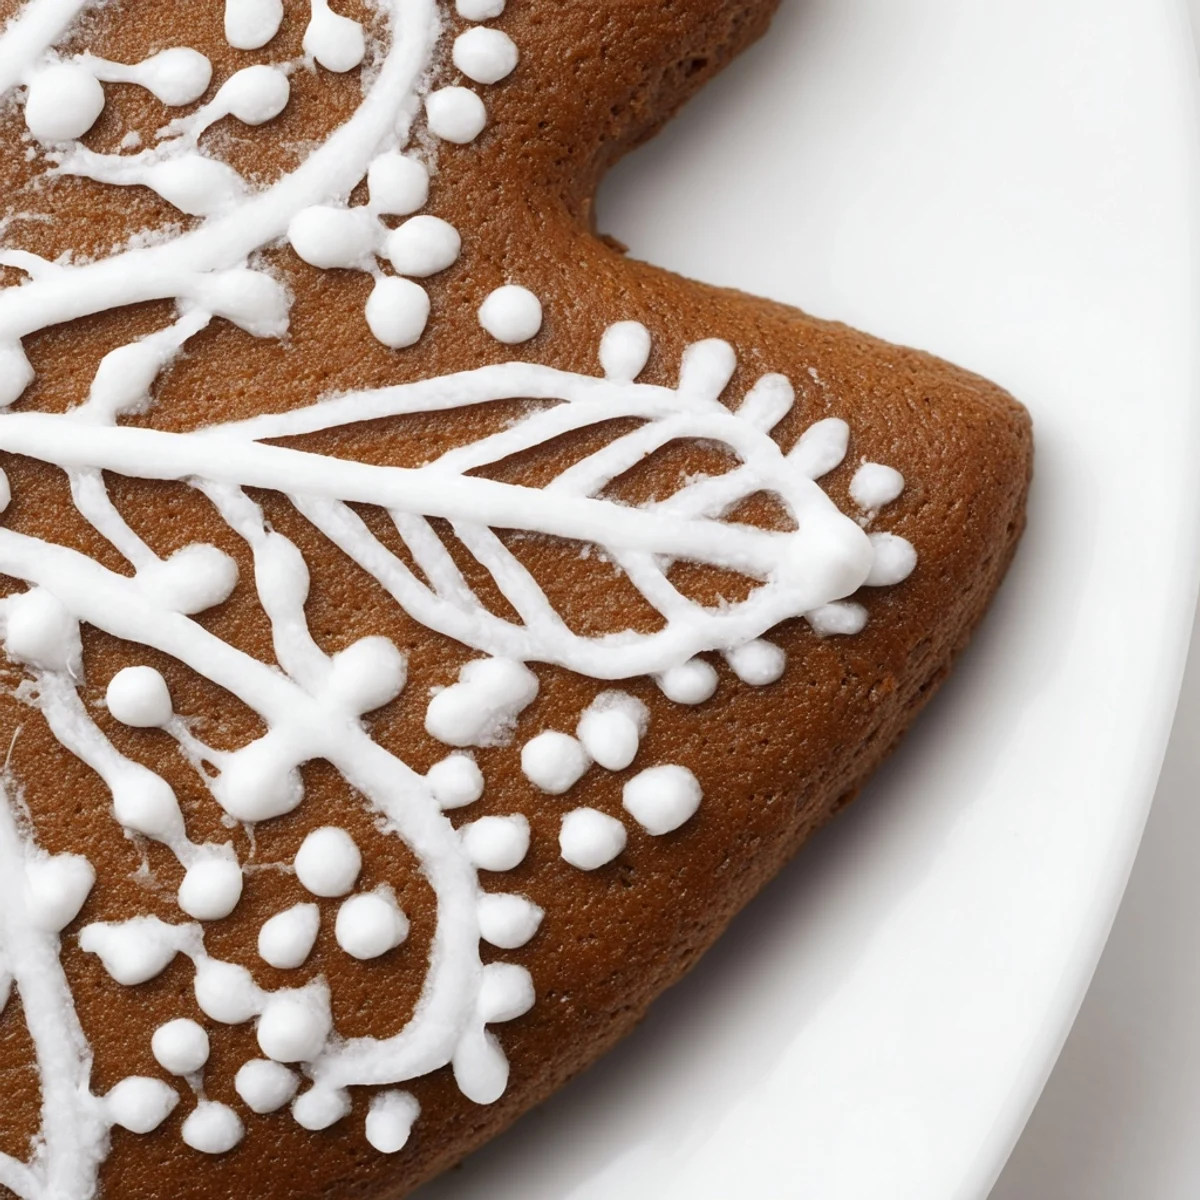
Save This classic spiced gingerbread features a delicate balance of ginger, cinnamon, and cloves, baked to achieve a crisp edge and tender interior. The dough requires chilling before rolling thin and cutting into shapes. Once baked, the cookies are decorated with smooth royal icing made from powdered sugar and meringue powder, allowing for elegant designs that dry hard and hold well. Perfect for holiday gatherings or gifting, these treats combine warm spices with a sweet, crisp finish that delights both visually and in flavor.
There's something about the smell of ginger and molasses warming in the oven that makes December feel real. I discovered these cookies by accident one year when I was trying to recreate something my neighbor brought to a potluck, and what started as a clumsy imitation became my own tradition. The combination of crisp edges with a tender, almost cake-like center hooked me immediately, and now I make them every season just to have an excuse to pipe royal icing designs while listening to the rain outside.
I'll never forget the first time I brought a box of these to work—my coworker who claimed she didn't like sweets took three. By the end of the day, she was asking for the recipe, and I realized these cookies work because they taste like comfort, not just sugar. There's something about the molasses and spices that makes people pause and actually taste them instead of just wolfing them down.
Ingredients
- All-purpose flour (3 cups): The foundation that keeps these cookies from spreading too thin; don't skimp on measuring by weight if you can.
- Light brown sugar (3/4 cup): Brings moisture and a subtle caramel note that all-white sugar won't give you.
- Unsalted butter (3/4 cup): Make sure it's truly softened—cold butter won't blend smoothly with the sugar and you'll end up with a grainy texture.
- Molasses (1/2 cup): This is the soul of the cookie; it creates depth and that chewy interior that makes people come back for more.
- Large egg (1): Acts as the binder that holds everything together without making the dough tough.
- Ground ginger (1 1/2 tsp): The warm, slightly peppery note that defines gingerbread—buy it fresh if you can, as old spices lose their punch.
- Ground cinnamon (1 1/2 tsp): Familiar and comforting, it bridges the gap between the earthiness of ginger and the sweetness of the cookie.
- Ground cloves (1/2 tsp): Use a light hand here—it's potent and brings an almost floral warmth if you don't overdo it.
- Ground nutmeg (1/4 tsp): A whisper of it rounds out the spice blend and adds complexity that people taste but can't quite name.
- Baking soda (1/2 tsp): Works with the molasses to give the cookies a tender crumb and slight rise.
- Salt (1/2 tsp): This is non-negotiable—it makes every spice sing and balances the sweetness.
- Powdered sugar (2 cups): For the icing, sift it before using or you'll have lumps in your piping bag that clog the tips.
- Meringue powder (1 1/2 tbsp): This stabilizes the icing and helps it dry hard so your decorations actually stay put; it's worth buying specially.
- Warm water (3–4 tbsp): Add it gradually when making the icing—you can always add more, but you can't remove it.
Instructions
- Cream butter and sugar until fluffy:
- This step takes longer than you'd think—at least 3 minutes with an electric mixer—because you're incorporating air that makes the cookies tender. Stop when the mixture looks pale and light, almost like frosting.
- Add molasses and egg:
- Mix until everything is fully combined and the dough looks uniform. If the molasses seems to sit on top at first, keep beating; it will incorporate.
- Combine dry ingredients separately:
- Whisking them together first prevents streaks of spice in some cookies and none in others. You want every bite to taste the same.
- Bring everything together:
- Fold the dry mixture into the wet mixture gently at first, then mix until a soft dough forms. Don't overmix or the cookies will be tough.
- Chill the dough:
- At least an hour in the fridge. This is when you make coffee or tidy the kitchen—the dough firms up so it won't spread everywhere when you roll it out.
- Preheat and prepare:
- Get the oven to 350°F (175°C) and line your baking sheets with parchment paper. Cold dough goes into a hot oven, which creates that crispy-chewy contrast.
- Roll and cut:
- Work on a lightly floured surface and roll to about 1/4 inch thick. If the dough gets too warm, pop it back in the fridge for a few minutes.
- Space and bake:
- Give each cookie an inch of space so the edges crisp up without the cookies touching. Bake until the edges are firm but the centers still feel slightly soft—10 to 12 minutes depending on your oven.
- Cool properly:
- Leave them on the hot baking sheet for 5 minutes so they set, then transfer to a wire rack. This prevents them from cooking too much on the bottom.
- Make the royal icing:
- Combine powdered sugar and meringue powder, then add warm water a tablespoon at a time while beating. After about 4 minutes of mixing, you should have stiff peaks that hold their shape.
- Decorate with patience:
- Transfer icing to piping bags and create whatever designs make you happy. Let it set for at least an hour before stacking or storing.
 Save
Save I remember decorating cookies with my niece on a gray afternoon, and watching her carefully pipe tiny dots of white icing across a cookie shaped like a mitten felt like witnessing something important. She was so focused, tongue poking out slightly, and when she finally finished and held it up to the light, the dried icing caught the glow. That's when I realized these aren't just cookies—they're an excuse to sit together and make something beautiful with your hands.
The Spice Blend That Changed Everything
The first time I made these, I used pre-mixed pumpkin pie spice out of laziness, and they were fine but forgettable. Then I bought whole spices and ground them myself, and suddenly the cookies tasted alive. The difference is that whole spices are fresher and more aromatic, and when you measure them fresh, you get a warmth and complexity that no pre-made blend can touch. Once you taste the difference, you'll understand why this recipe asks for individual spices instead of shortcuts.
Texture Matters: Crisp Versus Chewy
I used to bake these for exactly 11 minutes because that's what the recipe said, but one afternoon I pulled a batch out at 9 minutes and they were almost fluffy. My partner called them the best ones yet, chewy all the way through like a soft gingersnap. Now I bake two batches at different times—one at 9 minutes for those who like them tender, one at 12 minutes for people who prefer the snap. The beauty is that both versions are equally good; it just depends on what you're craving.
Decorating With Confidence
Royal icing can feel intimidating if you've never worked with it, but the truth is that imperfect decorations often look more charming than perfectly piped ones. I learned this when my piping bag split mid-decoration and I had to switch to smearing icing with a small knife—the result looked rustic and intentional, and people loved it more than my carefully piped versions. The icing dries hard enough to ship these in a box, stack them in a tower, or pile them on a platter without them sliding around, which makes them perfect for giving away or displaying at a holiday table.
- Let the icing dry completely before stacking—at least an hour, or overnight if you have time.
- If you want to speed up drying, place decorated cookies in a low oven (150°F or 65°C) for 10 minutes, then cool completely.
- Store decorated cookies in an airtight container with parchment between layers, and they'll keep for up to a week without the icing getting sticky.
 Save
Save These cookies taste like the season, like sitting by a window watching the weather change while you work with your hands. Once you master them, they become your secret weapon for bringing people together.
Recipe FAQs
- → What spices are used in the gingerbread?
-
The blend includes ground ginger, cinnamon, cloves, and nutmeg for a warm, balanced flavor.
- → How long should the dough be chilled?
-
Refrigerate the dough for at least one hour to ensure easy rolling and better texture.
- → What thickness is recommended when rolling the dough?
-
Roll the dough to about 1/4 inch (6 mm) for optimal crispness and tenderness.
- → How is the royal icing prepared?
-
Mix powdered sugar with meringue powder and water, beating until stiff peaks form. Food coloring can be added as desired.
- → How should finished cookies be stored?
-
Keep in an airtight container for up to one week to maintain freshness and icing quality.
