 Save
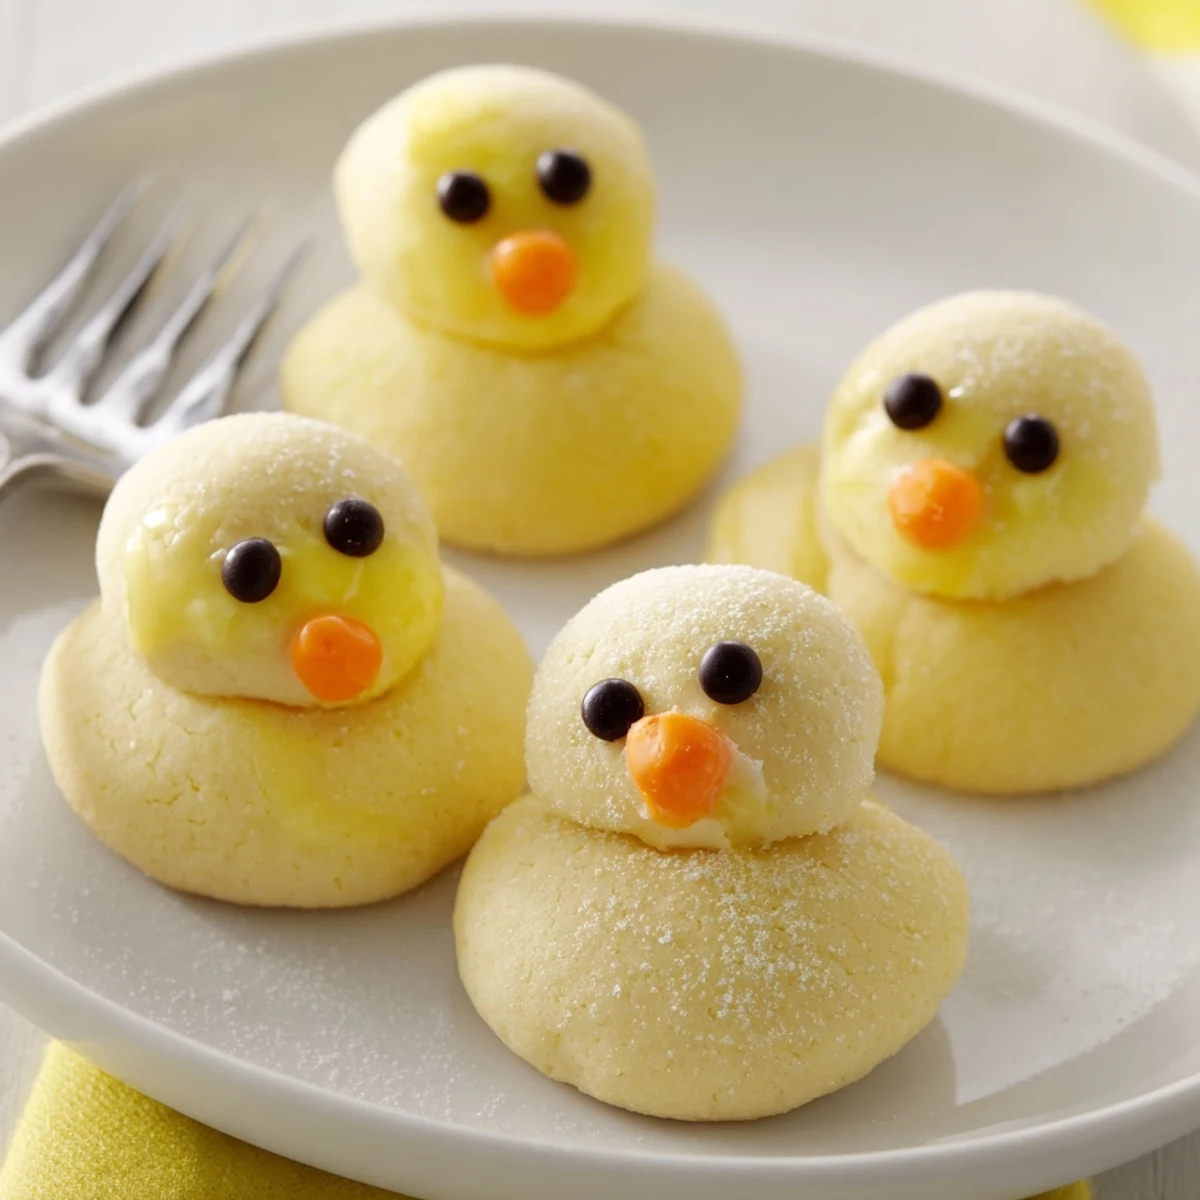
Save These delightful chick-shaped sugar cookies bring whimsy to any spring celebration. The dough starts as a classic butter sugar base, enriched with vanilla and tinted cheerful yellow. After baking until lightly golden, each treat becomes a feathered friend with simple gel frosting and candy details.
The process involves rolling two balls of dough—one larger for the body, one smaller for the head—then gently pressing them together before baking. Once cooled, a quick vanilla glaze adds shine while black and orange decorating gels create expressive eyes and beaks.
Kids love helping shape the dough and adding faces, making these perfect for family baking sessions. The 30-minute timeline and straightforward techniques suit bakers of all skill levels. Serve these at Easter brunches, baby showers, or anytime you need a cheerful dessert that spreads joy.
Last spring my daughter found an old cookie cutter shaped like a chick and declared we needed to make them for her class party. We spent a rainy Saturday afternoon with flour dusted across the counter and yellow food coloring stained fingers, creating a whole flock of these buttery little birds that disappeared faster than we could pack them up.
I made these again for Easter brunch and watched my aunt carefully arrange three chicks on her plate, claiming she was saving room for the main course. Later I found her sneaking back into the kitchen for just one more, laughing that they were too cute to resist and too delicious to stop at one.
Ingredients
- 2 1/4 cups all-purpose flour: The foundation that gives these cookies their tender crumb and perfect structure
- 1/2 teaspoon baking powder: Helps the chicks puff up slightly while keeping their shape intact
- 1/4 teaspoon salt: Balances the sweetness and enhances the buttery flavor
- 3/4 cup unsalted butter: Use this at room temperature for the creamiest texture and richest taste
- 3/4 cup granulated sugar: Sweetens the dough while creating that classic sugar cookie crunch
- 1 large egg: Binds everything together and adds structure to the dough
- 1 teaspoon vanilla extract: Pure vanilla extract makes these cookies taste like home
- Yellow food coloring: Gel coloring works best for vibrant yellow without thinning the dough
- 3/4 cup powdered sugar: Creates a smooth white glaze that makes the yellow pop
- 2 tablespoons milk: Adjust this to get your glaze to the perfect brushing consistency
- Black decorating gel or mini chocolate chips: These become the eyes that give each chick its personality
- Orange decorating gel or candy: Forms the beaks that bring these little birds to life
Instructions
- Preheat and prepare:
- Heat your oven to 350°F and line two baking sheets with parchment paper so your chicks bake evenly and release easily.
- Mix the dry ingredients:
- Whisk together flour, baking powder, and salt in a medium bowl, ensuring the leavening distributes evenly throughout.
- Cream the butter and sugar:
- Beat butter and sugar until pale and fluffy, then add egg and vanilla until the mixture looks like satin.
- Combine everything:
- Gradually mix in the dry ingredients just until a smooth dough forms, being careful not to overwork it.
- Color the dough:
- Add yellow food coloring a few drops at a time, kneading until the color is uniform and sunny bright.
- Shape your chicks:
- Roll dough into 1-inch balls for bodies and slightly smaller balls for heads, gently pressing them together on the baking sheet.
- Space them out:
- Leave about 2 inches between chicks so they have room to bake without touching.
- Bake to perfection:
- Bake for 8 to 10 minutes until edges are barely golden, then let them cool completely on the sheets.
- Add the glaze:
- Mix powdered sugar with milk until smooth, then brush a thin layer over cooled cookies for a beautiful shine.
- Give them faces:
- Add dots of black gel or chocolate chips for eyes and tiny orange triangles for beaks, then let everything set before serving.
 Save
Save My niece insisted on making each chick unique, giving some winks and others surprised expressions. The tray became a personality parade, and honestly those silly faces made them taste even better.
Making Them With Kids
This recipe is perfect for baking with children because the steps are simple and the decorating lets creativity shine. Set up a decorating station with different face options and let everyone create their own flock.
Storage Tips
Store these cookies in an airtight container at room temperature for up to five days. Place parchment paper between layers if you stack them to protect those precious faces.
Party Planning
Double the batch easily because these disappear quickly at gatherings. Consider setting up a chick decorating station where guests can add their own faces.
- Make the dough a day ahead and keep it refrigerated for fresh baking
- Prepare all the decorating supplies in small bowls for easy access
- Have extra powdered sugar on hand to thicken the glaze if needed
 Save
Save These chick cookies have become our spring tradition, a simple treat that brings joy whether baking alone or with a kitchen full of helpers.
Recipe FAQs
- → Can I make the dough ahead of time?
-
Yes, refrigerate the colored dough for up to 48 hours wrapped tightly. Let soften slightly at room temperature before shaping and baking.
- → What if I don't have food coloring?
-
Natural yellow works beautifully without coloring—the buttery vanilla flavor remains unchanged. For pale yellow, add a pinch of turmeric or saffron to the dough.
- → Can these be frozen?
-
Bake and cool completely, then freeze undecorated cookies in airtight containers for up to 3 months. Thaw and add facial decorations before serving.
- → How do I prevent the heads from separating during baking?
-
Gently press the head and body balls together firmly enough to bond. Chill assembled shapes for 10 minutes before baking to help them hold their form.
- → What alternatives work for decorating faces?
-
Mini chocolate chips, raisins, or currants make eyes. Orange candy, carrot pieces, or almond slivers create beaks. Use whatever edible decorations you have on hand.
- → Can I double this batch?
-
Certainly—these scale easily. Use two baking sheets simultaneously, swapping halfway through baking. You'll get about four dozen treats from a doubled batch.
