 Save
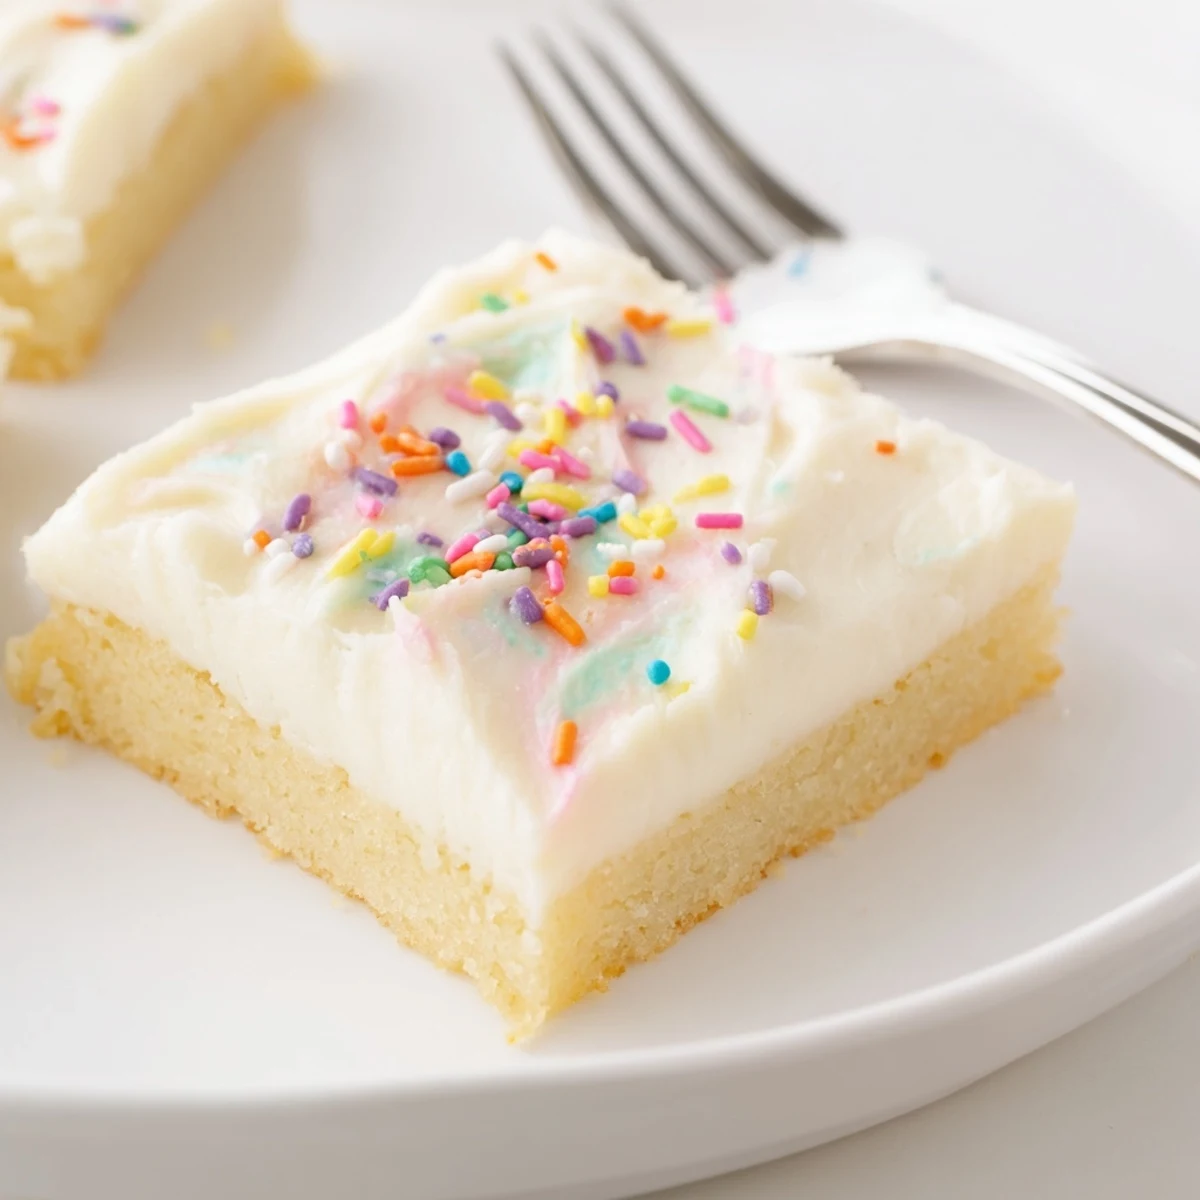
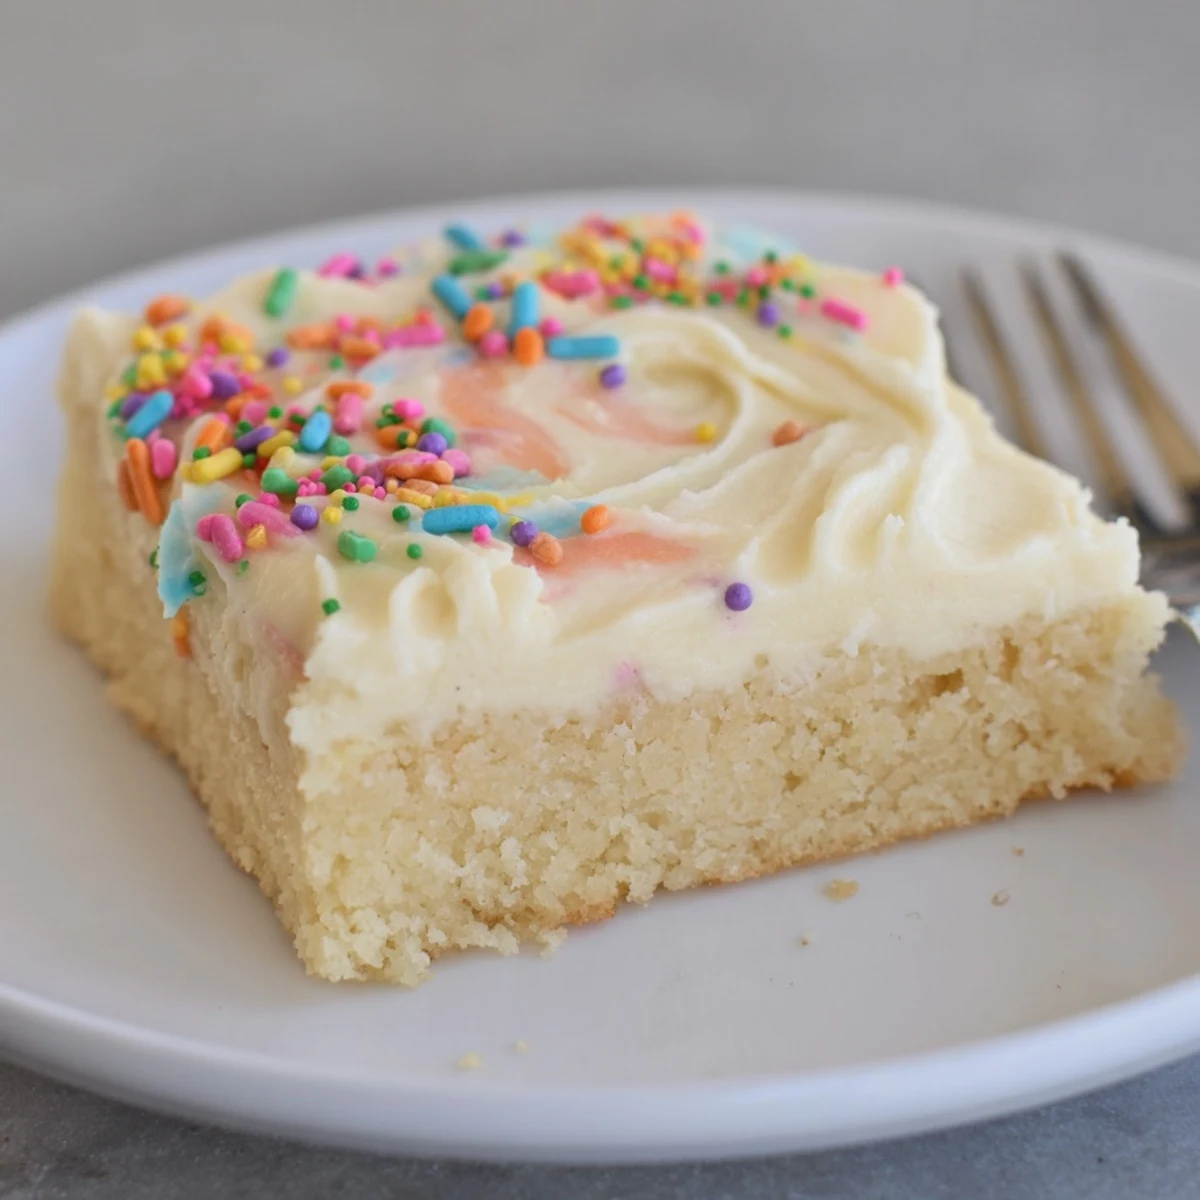
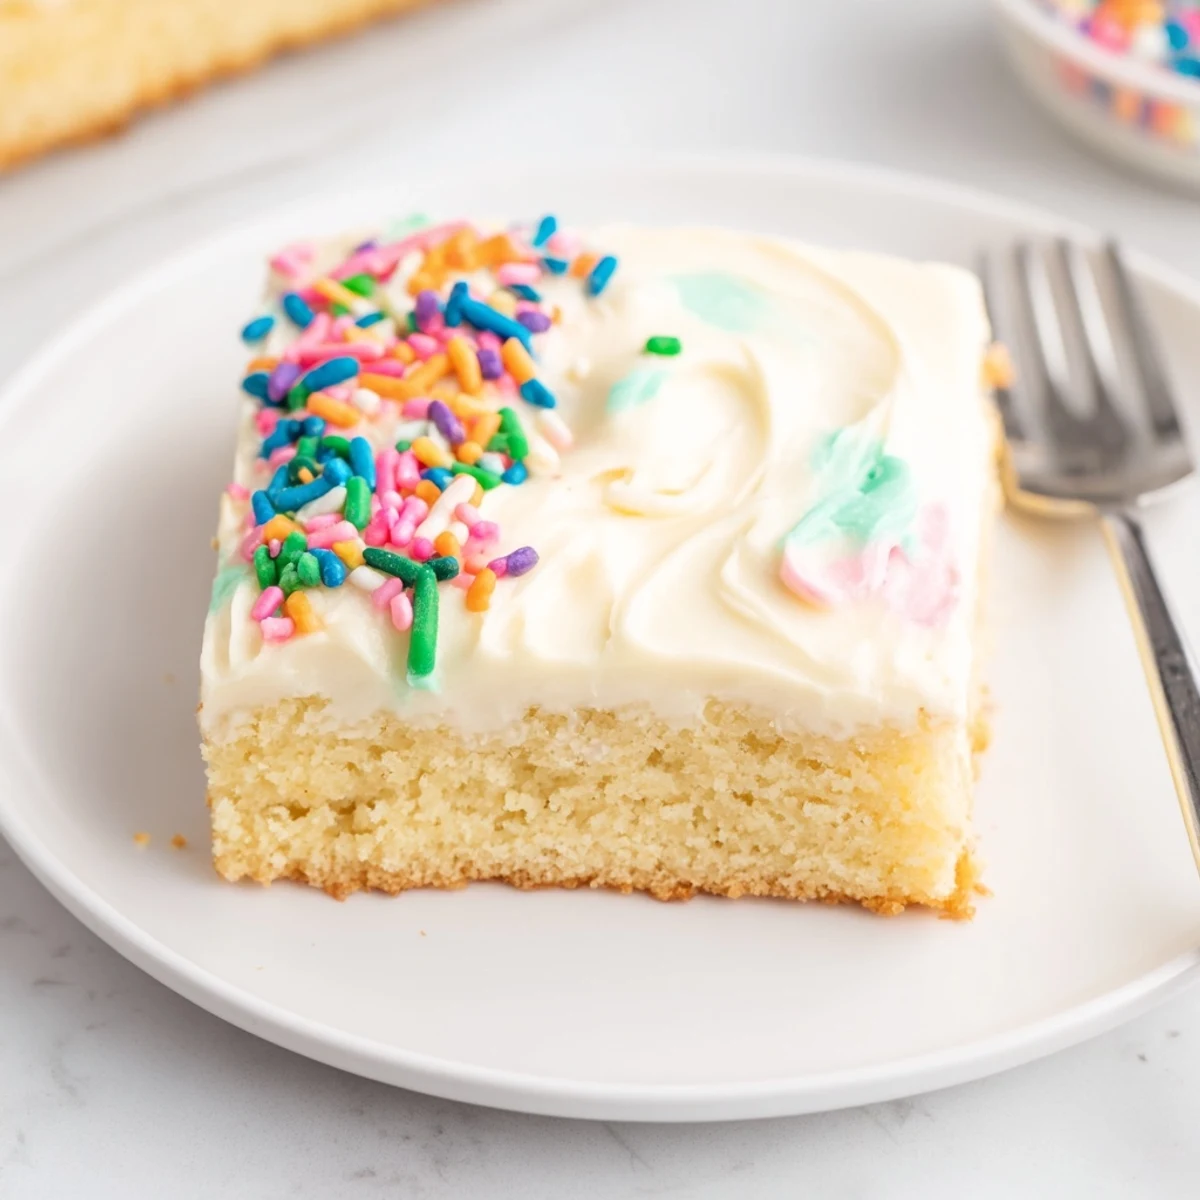
Save Soft, buttery sugar cookie bars are baked in a 9x13 pan until just set, then cooled before spreading a fluffy vanilla buttercream. Creaming butter and sugar yields a tender crumb; avoid overbaking to keep bars moist. Add a splash of milk for spreadable frosting, tint as desired, and finish with sprinkles. Store airtight up to 3 days or chill for longer.
My kitchen counter was a disaster of flour dust and rainbow sprinkles the afternoon I figured out that sugar cookies could be bar cookies instead. I had been rolling and cutting individual rounds for two hours, cursing under my breath every time a snowman lost an arm in transit to the baking sheet. That is when I pressed the entire batch of dough into a single pan, crossed my fingers, and discovered something that would change my party dessert game forever.
I brought a tray of these to my neighbors holiday potluck last December and watched three adults hover protectively over the platter until every last crumb was gone. One of them actually asked if I had ordered them from a bakery, which remains the proudest moment of my amateur cooking life.
Ingredients
- All-purpose flour (2 1/2 cups or 320g): The backbone of the dough and spooning into the cup then leveling off makes a real difference in getting that tender texture.
- Baking powder (1/2 teaspoon): Just enough lift to keep the bars soft without turning them cakey.
- Salt (1/2 teaspoon): Do not skip this because it balances every bit of sweetness in both the cookie and the frosting.
- Unsalted butter (3/4 cup or 170g for the dough plus 1/2 cup or 115g for the frosting): Softened butter is nonnegotiable here so set it out an hour ahead and your arms will thank you.
- Granulated sugar (1 cup or 200g): Creaming this with butter is where the magic starts and you will see the mixture turn pale and cloud-like.
- Large egg (1): Binds everything together and adds richness to the crumb.
- Pure vanilla extract (2 teaspoons for the dough plus 1 teaspoon for the frosting): Use the real stuff if you can because imitation vanilla will flatten the flavor.
- Whole milk (1/4 cup or 60ml): A splash of moisture that makes the dough spreadable and easy to press into the pan.
- Powdered sugar (2 cups or 240g): The key to silky frosting so sift it if it looks lumpy.
- Heavy cream or milk (2 tablespoons for the frosting): Thins the frosting to the perfect spreading consistency.
- Pinch of salt for the frosting: A tiny pinch in the frosting cuts the sweetness beautifully.
- Food coloring (optional): Gel colors work best without watering down your frosting.
- Assorted sprinkles: The more the merrier and jimmies hold up better than round nonpareils.
Instructions
- Get your pan ready:
- Heat the oven to 350 degrees Fahrenheit and line a 9 by 13 inch pan with parchment paper leaving some overhang for easy removal. A light greasing on the parchment ensures nothing sticks.
- Whisk the dry ingredients:
- Combine the flour, baking powder, and salt in a medium bowl and give it a good whisk to aerate everything. Set it aside while you work on the butter.
- Cream butter and sugar:
- Beat the softened butter and granulated sugar together in a large bowl until the mixture looks pale and fluffy which usually takes two to three minutes. Scrape down the sides once or twice so nothing hides from the beaters.
- Add egg and vanilla:
- Drop in the egg and vanilla extract then beat until everything is smooth and cohesive. The batter should smell like a birthday cake at this point.
- Incorporate the milk and dry ingredients:
- Pour in the milk and mix briefly then add the flour mixture in two or three additions, stirring until just combined. Stop mixing the moment you stop seeing dry flour streaks.
- Press into the pan:
- Transfer the dough to your prepared pan and use your hands or a spatula to press it into an even layer all the way to the corners. Damp fingers help prevent sticking if the dough is tacky.
- Bake until just set:
- Slide the pan into the oven for 16 to 18 minutes until the edges are barely golden and the center no longer jiggles. Underbaking slightly is far better than overbaking because the bars will continue to set as they cool.
- Cool completely:
- Leave the bars in the pan on a wire rack until they are entirely cool to the touch which takes about an hour. Frosting warm bars is a fast track to a melted mess.
- Make the frosting:
- Beat the softened butter for the frosting until creamy then gradually add powdered sugar, heavy cream, vanilla, and a pinch of salt. Beat until the frosting is smooth and fluffy and add food coloring now if you are using it.
- Spread, sprinkle, and slice:
- Pile the frosting onto the cooled bars and spread it evenly with an offset spatula or the back of a spoon. Scatter sprinkles generously over the top then cut into 24 squares and serve.
 Save
Save The moment those colorful sprinkles hit the frosting and I handed the first square to my daughter, I knew this recipe had earned a permanent spot in my life. Food does not need to be complicated to become a memory.
Storage and Make Ahead
These bars stay wonderfully soft in an airtight container at room temperature for up to three days, though they rarely last that long in my house. You can refrigerate them for up to a week and the chilled version actually has a lovely fudgy quality that some people prefer.
Adapting for Dietary Needs
A one-to-one gluten-free flour blend works beautifully as a substitute if you need to avoid wheat. Dairy-free butter and plant milk can replace the butter and milk but choose a brand you trust because some alternative butters behave differently when creamed.
Making It Your Own
Part of the fun is switching up the frosting color and sprinkle shape to match whatever you are celebrating, from orange and black for Halloween to pastel eggs for spring. I have even swirled two frosting colors together for a marbled look that gets people talking.
- Try adding a teaspoon of almond extract alongside the vanilla for a subtle bakery-style depth.
- Press chocolate chips or toffee bits into the dough before baking for extra texture.
- Always let the bars cool completely before slicing for the cleanest edges.
 Save
Save Whenever I need a crowd-pleaser that asks very little of me, this is the recipe I reach for. Sprinkles optional but strongly encouraged.
Recipe FAQs
- → How can I prevent the bars from becoming dry?
-
Bake until the edges are lightly golden and the center is just set; removing from the oven a minute or two earlier keeps moisture in. Cool completely in the pan to let carryover heat finish the center without overbaking.
- → What gives these bars a tender texture?
-
Creaming softened butter with granulated sugar traps air and creates a light crumb. Adding the milk and avoiding overmixing when incorporating dry ingredients preserves tenderness.
- → How do I get a smooth, spreadable frosting?
-
Beat softened butter until creamy, then add powdered sugar gradually with heavy cream or milk and vanilla. Adjust liquid a teaspoon at a time for desired consistency; beat until fluffy for easy spreading.
- → Can I make a gluten-free version?
-
Yes. Substitute a 1:1 gluten-free flour blend that contains xanthan gum or add it separately for structure. Watch baking time closely, as gluten-free mixes can brown differently.
- → What pan size is best and how does it affect thickness?
-
A 9x13-inch pan yields the classic thickness shown. Using a smaller pan will produce thicker bars and may require a longer bake; a larger pan will thin them and shorten baking time.
- → How should I store and freeze the bars?
-
Store in an airtight container at room temperature for up to 3 days or refrigerate up to a week. For freezing, layer bars between parchment and freeze in a sealed container; thaw in the fridge before serving and refresh frosting if needed.
